A small chick will become the main decoration of the Easter table, an excellent key chain and a wonderful reminder of the pleasant moments of the holiday. And if you make a whole family of chickens, they will definitely eclipse at the school exhibition.
Today I will show you how to make two chickens: Newborn(and therefore very surprised), and older, on short thin legs.
To make a newborn Easter chicken, you will need:
- yellow threads (acrylic, cotton, wool),
- round artificial eyes (or two black beads),
- red cardboard (for scallop, paws and kelp),
- two Circle Circled Card.
We start doing chicken!
1. Take two circles with cut-out middle. The outer diameter is the size of your future chick, and the internal determines the density of the pompon. The more carved part - the more threads you can wind, and therefore the pompon will be densely.
So it's time to decide whether you have a tiny chicken or a rather impressive broiler \u003d)

2. Clear two circles together and wrap them with threads.


But if you have a big pompon, you will see the meters of 15 threads, spreading them to memero, and already be accepted for work. So it will be much faster.


3. Redraw thread, as shown in the photo. Scissors must come between two cardboard circles.

4. By cutting the threads to the end, take a new thread with a length of 20 cm, turning it between two cards and pinch it stronger so that the pompon kept the form well.

5. Now scissors cut and remove cardboard circles from the pump - they are no longer needed there.

6. Did you do Well done! It's time to visit the beauty salon and make your chicken chic hairstyle.
Align Pompon, straighten the threads, cutting in the right places, and you can go further.

7. Cut from red cardboard scallops and legs.

Chuck to chicken. Like this:


8. Now the eyes of eyes and a keyboard consisting of two red-droplets. Beauty!

We carry out the second chicken, which can already walk.
For work, additionally prepare:
- glue moment crystal
- wire,
- red threads
- two chevy bispers
- red bead-cone.
1. Make 2 Pompon (you already know how): one is small, and the other is more. Threads that will be tied up with pumps, do not cut off - they will be useful when binding the parts of the body of chicken.

2. And now the trinity of the thread. From thin wire, make a chicken leg: Three fingers will be ahead and one behind.


3. Slightly smeared with glue paws, wrap them with red threads.

4. Give a red bead-cone. This is a key chicken. Two black bispers are glued to the eye place.

And here are our two handsome. Sit them in and rather to a friend - congratulate on Easter and!
Useful advice
Crafts for Easter from different materialsEaster is one of the most important and beautiful church holidays that are very like not only believers. This year, the Orthodox Easter celebrates quite late - 5 May. So you will have more time to prepare for it, make interesting handicrafts gifts and decorations For relatives and loved ones.
The most popular the symbol of Easter and the revival of a new life is an egg. Chicken eggs paint in all sorts of colors, decorate with drawings and patterns and give each other as edible gifts. In more detail about Easter eggs and how to paint them, you can read. But you can make eggs with your own hands.
Easter eggs do it yourself
Make an Easter egg-craft do it yourself is not so difficult. To do this, you do not need to be a famous Faberge Master or have unique artistic abilities. You have enough attach a little patience and fantasy.

To work, we will need:
Building Gypsum (Alabaster)
Saucepan to breed a solution
Measuring cup
Funnel
Spoon and knife
Plastic egg consisting of 2 halves, or ordinary chicken eggs

Let's start working:
1) C stupid side eggs Do the hole for filling the gypsum using knife or scissors. If your plastic egg has holes with a sharp side, creep them with a scotch. Also as a form can be used shell of ordinary eggFrom which you should pour content.

2) Dilute gypsum with water at the rate 5 tablespoons of gypsum with a slide on 180 ml of water. You should have a consistency of liquid sour cream without lumps so that the liquid can be pouring into the egg.


3) Fill the gypsum into the hole of the egg and leave it to dry for an hourAfter that, remove the plastic halves or clean the shell.

4) As a result, you should get gypsum Egg Ideal Formwhich is ready for further processing and any possible jewelry.

Easter eggs do it yourself (video)
How to make Easter eggs from threads?
One of the simplest ways to get the original Easter egg-craft - shape threads with glue. As a form is usually used balloonwhich can be easily removed by leaving a braided frame. You can also vary the size of the egg itself, more or less inflating the ball.

To work, we will need:
Balloon
PVA glue or starch with water
Stand for drying
Details for decorations
Let's start working:
1) Inflate the desired size ball and drag it well, so as not to let the air.

2) wetting the thread by glue, wrap them with them so that the holes remain.

3) When the ball will be completely wrapped, install it on the stand and give adhesion to dry during the day.

4) After drying, push the ball with a needle and pull it out through the holes. The frame of the thread will retain the form.

5) To decorate the resulting egg from the thread, you can use multi-colored ribbons, buttons, beads, toys and much more.

6) Applying fantasy, you can get here such original Easter crafts:

Easter eggs from beads
Beading For some, it may seem a rather difficult task that requires a lot of time and patience. But with the help of small beads, you can decorate an artificial or natural Easter egg in just a couple of minutes without complicated techniques.

To work, we will need:
Beads or decorative sprinkle in the form of balls
Glue and brush
Capacity
Stand for drying
Details for decorations

Let's start working:
Natural or artificial eggs do glue and wear well in beads or sprinkling.

Ovulsually can be found in the stores, in the hotel baking jewelry, Easter cakes and other sweets are often decorated.

If you have very small beads, you can break the testicle in them, however, for this purpose you better use artificial Eggs - Wooden or GypsumSo that they served for a long time decoration.

If you still want to learn how to weave the decorations from beads, you can use the following video / beading lessons:
Easter eggs from beads master classes (video):
Macaron Easter Eggs
Jewelry for Easter eggs There is a great set, but we would like to offer the most simple and original decorationswhich is easy to do at home.

To work, we will need:
Wooden eggs or shell without content
PVA glue and brush
Stand for drying
Small pasta stars
Dry glistening

Let's start working:
1) Apply glue on a wooden egg and stick to it with even rows raw pasta-star. However, they can be positioned in any order at will. Let the adhesive dry well.

2) Paint eggs together with asterisks paint, decorate sparkles. In order for the sequins well to have, apply glue on the egg in the right places, sprinkle with sparkles, and in 15 minutes Sharpe extra.

3) As a result, you should turn out the original bright handicraft:

4) Eggs can be put in the Easter basket decorated with rugs.

Stand for Easter eggs
The simplest stand for Easter eggs you can do together with children from the simplest materials: cardboard, Lace, Corrugated Paper.
To work, we will need:
Not too tight cardboard or base from the roll of toilet paper
PVA glue and brush
Lace
Needle with thread
Scissors
Details for decoration
Let's start working:
For the manufacture of the first version of the stand take basis from the roll of toilet paper And cut it into several parts so that the stand is not too high.
Of corrugated paper Cut a wide strip and get on the cardboard in the form of a skirt.
Next decorate soft wire or slices organza. You can also add bright parts in the form of artificial paper colors. On how to make corrugated flowers, you can read.

In the second option, you replace corrugated paper lace.which, with a thread with a needle, you need to issue in the form of the same skirt. As an additional jewelry was used thread pearl beads.

Easter wreath
A simple Easter wreath can be made with their own hands from cardboard packs for eggs, as well as corrugated paper, ribbons, artificial colors and other jewelry.

To work, we will need:
Empty cardboard packs for eggs
PVA glue and brush
Scissors
Details for decoration
Let's start working:
1) from the cardboard packaging gently cut out the core and treat it with scissors so that it happens something like colors with petals.

2) You should have enough such "flowers" to attach them one in another and get a wreath.

3) Using the thread from corrugated paper, make leaves and stems. Use also ready-made paper flowers. Flowers can be easily made independently or buy ready. Insert the "Flowers" from the cardboard one in another, shifting them with paper flowers and leaves, well fixing glue.

Easter wreath It will be great to look at the festive table, or it can be hung on the door or wall as an ornament.

Easternica or Easter Napkin for Festive Table
This original napkin is not only an ornament for the holiday, it can be presented as a gift to loved ones by filling out Easter eggs and sweets.

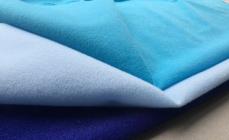
To work, we will need:
Color cotton fabric
Lace
Scissors
Rule and chalk
Sewing machine
Fliselin
Pins
Let's start working:
1) Prepare 6 identical circles From tissue diameter 40 centimeters. Each circle needs to be glued with fluzeline so that the product obtained is well held by the form even after you post it. If you do not find Flizelin, you can do without it, but use dense fabric.

2) Fold two circles with the involving sides of RUG to a friend and treat the edges with lace. As a result, you should get three rather dense rag round blanks.

3) Fold three parts and secure them with pins. Then, with the help of a ruler and chalk, apply four flat lines, dividing the circle so on 8 equal parts. With a saucer, circle a chalk center.

4) Come to the line on the cracked lines i stitched all three circles together.

5) Using a needle and thread do wide stitches around the core, capturing the two upper layers. Then pull the thread and make it a node. On the diagram it will look like this:

You need to pull the thread in order for the upper layers a little bit and raised:

6) Put in the recesses for eggs painted eggsAnd on top you can put Easter cakes, cookies, candy or any other sweets. You can add a couple of parts from lace trimming.

Easter basket do it yourself for eggs
This simple basket can be made using thick paper trimming. Even children will help you in this.

To work, we will need:
Colored paper (dense)
Stapler
Scissors
Ruler and pencil
Let's start working:
1) for basket baskets cut 5 paper strips 25 and 3 centimeter width 3. Fold them up vertically, and at the top with the help of glue and stapler, attach a horizontal strip of the rim of another color, the size of which should be 30 by 2 centimeters. Such strips should be 2 more pieces.

2) Fold the rim in the circle and secure it with a stapler from the opposite side.
Stand for Easter eggs do it yourself
Homemade Stands for Easter Easter: Easter Juroys
We will create a daughter for Easter! We want to make homemade eggs for eggs in the form of Easter chickens. While at the stage of collecting ideas. I am glad to share them with you. I hope someone will also come in handy for joint creativity ;-)
Today we want to tell and show how to make an Easter chicken from paper and not only. Most of the separations offered by us are designed to put in the chicken in the chicken. And some can be mastered not only for Easter, but also on any other day. So, let's begin.
Easter chicken paper
Wonderful chicken, isn't it? And I will cope with such a handicraft, the modpet is even the smallest child. The main thing is that he know how to draw and can paint the chicken. The older the child, the more actions he can perform independently: cut the workpiece, paint, glue. Billet can be downloaded and print. Thanks to the site krokotak.com for the idea.
Easter chicken from roll of toilet paper
To make the following sympathetic non-drying chicken, we will need:
- toilet roll
- paints or markers
- scissors
- sheet of yellow paper

So that you are clear how to make an Easter sink chicken with your own hands, we have prepared a detailed photo inhibition. So, as you can see, you first need to print the workpiece. If you draw well, you can draw your head, wings and tail on your own. Then paint the part.
The next step is to prepare the body of our zoom. To do this, cut out a thin strip from the roll of toilet paper and check it for stability. Now you can save it yellow (brown, orange, your taste) paper or simply paint the gouache. When you finish with the case, we make cuts on both sides, where we will be attached to the head and tail (step 5 and 6). Fresh head and tail and glue wings.
And now I will add some more decorative elements: cut out of the sheet of colored paper. NATS for our Easter chicken (step 7 and 8), and then collect all the crafts together. To be a truly festive, we can put near our chicken-colored Dragee type M & M "S or small testicles that can be rolled out of colored stripper.
Crafts for Easter Funny chiches from rolls of toilet paper

These cheerful chickens can be easily made if you have multi-colored decorative feathers for crafts. Yes, that is what they are called and you can easily find them in the online store of your city. And if you have real chickens on your farms, then you can easily use their feathers. So, we will need:
- paints
- toilet paper rolls
- cruvich colored paper
- scissors
- multicolored decorative feathers
- eyes with rotating pupils for crafts (they can be drawn by felt-tip pen)
As you can see, make it quite simple to make such chickens. Coloring them and "dressing up", whipped wings, tails, eyes and beaks. Merry sympathets, isn't it?
Easter shells chicken gloves

For those who love and know how to sew, as well as for those who only learn to this, we suggest to make it easier for such a pretty Easter bird. As you can see, you will be hoping:
- glove (White, Brown, Color)
- felt or dense fabric for wings, crest and beak
- black beads or bispers for eyes
- thicks
- needles
- wat (syntapone, any other filler)
- scenery for petition (for example, basket with straw, eggs)
As you can see the photo of the finished crafts, the thumb of the gloves will serve us as a neck and head. We are taking off the comb, beak and eyes, and on the sides of the gloves with a sleeve of a wing. After that, fill our crafts with cotton, leaving the "tail" from four fingers empty. When the chicken is ready, you can start decorating. We find the appropriate basket (box, tray) for the petition and fill it with straw (sliced \u200b\u200bstrips of a glassmag or a filler from a gift box). We will put our Easter chicken on the "nashet" and decompose the colored or simply white decorative testicles near it. Thanks for the idea of \u200b\u200bthe site laclassedellamaestravaalentina.blogspot.it.
Easter jury from egg tray

Another option to independently make a chicken - use a small egg tray with a lid. Additionally, we will also need:
- colored paper either cardboard for wings, tail, neck and head
- yellow (brown, any other paint paint "torso")
- decoration (you can use colored paper as in the photo)
Cut out, deactivate, glue - nothing complicated! It is absolutely necessary to repeat a non-aid, as in the photo. The main thing here is the idea itself from which you can push off and create your unique chicken together with the child. And putting the Easter eggs inside the tray - paints. Merry joint creativity!
Homemade Stands for Easter Eggs

You can also not make much effort to create wonderful stands for Easter eggs from cardboard boxes. Options may be set. In the photo on the left we presented several options that you can use in joint work with kids.
As you can see, it all depends on your imagination and availability of materials: decorative feathers, paints, trumpet paper. The main thing is to your hand at your hand turned out to be a cardboard box of eggs, glue and scissors. But the detailed photo of the instruction to the first option:

Drinking chicken for Easter from egg trays and paper plates

As in previous versions, it all depends on the presence of materials. Eye, legs, wings, tail, crest can be cut out of paper, can be used from dense tissue, or decorative feathers and eyes with rotating pupils can be used. The main thing is that such a joint creativity brings you pleasure with your child.

And here is another fairly simple way to make cute chickens from paper plates. Perhaps the baby wants to paint them on his taste. Let him do it, get a wonderful fabulous chicken, which we clearly demolished multicolored Easter eggs.
For the manufacture of chicken-basket you will need:
- printed on the printer or perverted from the hand pattern of all the details in the amount you need;
- Fabric for the front of the chicken and lining fabric;
- gasket material (doubler on a knitted basis or stagnant in several layers of phlizelin);
- small segments of the felt of red, white and black colors;
- sewing threads in tissue tissue;
- glue (or tailor pins).
First, prepare everything you need and transfer the pattern of all parts on paper in the size you need, then cut out and transfer the contours of parts to the fabric in the desired quantity. Fissure parts need to be cut, leaving 1 cm allowance for the seams. The tissue for the chicken is suitable as cotton and synthetic with a print or monophonic. Felt parts of the beak, a hokholka and eyes cut without spaces.
So that the chicken-basket holds the form, you will need a padding material for density, from which you need to cut out according to the pattern of the parts and the bottom. Details of the sides and the bottom cut without an allowance, we declare on the trained part of the front of the church and stroke the iron at a large temperature. Then he hand the eye details. Fold in pairwise facial sides to each other front and outcomed sides of the sides, scratch around the edge, remove and straighten the seams. Then the prepared details of the sides are shred by manually by a secret seam, gently sewing the beaks and a hooker.
Donyshko Seal, scratch around the edge, remove, straighten the seams, then with the help of portor pins, attach the bottom to the parts of the sides (the photo is fixed with glue) and sew all the parts around the edge. Seam re-adjust the tissue strip.
Easter meal also has its booty traditions. This is one of the key moments of the bright idle of the resurrection of Christ. And decorate a rowly served table with suitable objects - it means to make this moment especially bright and joyful. The simplest tape "Zigzag" and funny motives with chickens presented below products "dilute" the rigor of the black and white cell.
Napkin.
Size 35 x 35 cm, "chicken" 4.5 x 5 cm.
You will need: Loskuts of red felt, fliesline with adhesive layer, threads for machine embroidery, copier, 41 x 1 4 cm of fabric in black and white cell, 135 cm black tape "Zigzag".
Completing of the work: Flyzeline root to the back of the felt. Translate the application of the application but the paper side of the phlizelin and carve out the applique without allowances on the seams. Remove the protective layer of phlizelin and maintain the applique, retreating 10 cm from the corner. On the edge, perform a double bending to a width of 2 cm with a surge inside by 1 cm. Angles of grinding, unnecessary fabric cut off. Fink is separated by a black braid.
Click to enlarge patterns.
Warmer for eggs.
Height 8 cm, Motive size 4 x 4 cm. You will need: a little moulin of white, red and brown. Preparation for work: Turn the pattern on the traction and cut. From the checkered fabric to carve out the same parts, to leave 1 cm in the sutures on the sides, with a bottom - 1.5 cm. Edges to handle the Zigzag seam.
On the pattern, cut 3 parts from fliesline without stacks on the seams.
Embroidery: Soooo "smooth" full thread, seam "Knot" brown thread in 3 additions. Easy the chicken on all three details, retreating 2 cm below. Scallop, beak and paws to embroider in a thread of red, the torso - white thread, and the eye is a brown thread. Cell details folded facets and stack. Extra points on the seams cut off and edges to handle the Zigzag seam. Details from Fliselin shall become a secret seam and insert into the cap from the checkered fabric. The lower edge of the heating pads is treated with a double fog of 1 cm wide with a surge inside by 0.5 cm.
Tablecloth.
Size 160 x 120 cm, "chicken" 4.5 x 5 cm.
You will need: for middle 82 x 1 22 white cotton fabric and 170 cm fabric in black and white cell; 650 cm thin red satin tape; 830 black tape "Zigzag"; 10 cm of red felt, fliesline with adhesive layer; black and white threads for machine embroidery; Copy, pencil.
Preparation for work: Flyzeline root to the back of the felt. For each angle, cut 4 chicken in 4 chicken, with 2 of them in mirror mapping.
Cutting with a bunch on seams 1 cm: From the plaid tissue to carve 2 bands of 25 x 170 cm and 25 x 130 cm; Appliques to carve out without letters on the seams. From the braid to cut 4 parts of 82 and 122 cm.
Completing of the work: The edges of the tissue to handle the Zigzag seam. The braid is pulled out to white tissue, retreating from the edge of 10 cm, and then retreating from the previous braid 9 cm. Applications are located in the center formed in the corners of the squares. After the applique fitting, to embroider on the sewing machine, the beak, scallop and pupil the thread of black color, and the contours, eyes and the wing - white thread. Start checkered stripes into the frame. Corners Start perish.
Excess fabric cut. Fold the frame with the middle part of the front side and fill. On the checkered fabric, perform a double bending 2 cm width. The joint line of the checkered frame and the middle is separated by a red satin ribbon, laying beautiful corners. Cut 10 pieces of tape 20 cm, tie a bow and sew on the corners and 2 bow on each side.
Chicken heater.
Size 25 x 35 cm.
You will need: 40 cm of plaid fabric, red felt flasks, 65 cm Zigzag braids, fliesline with adhesive layer, filler, 2 black beads, cartridge, copier, pencil. Preparation for work: Copy patterns.
Cutting: Fliseline is rooted to the back of the felt, fold felt in half, pasted. Clean the scallop from it, the beak and the beard with 1 cm allowance on the seam from the other side where they have to sew. Clean the details of the hen's body with a 1 cm viscosity: side - 2 times (and 1 - in mirror mapping), lining - 2 times, inserts - 2 times, the bottom is 1 time.
Completing of the work: Take a braid on the side details for the image of the wings. Inserts to cover the front side between halves of chicken. Touch the bottom. Fold the halves of the front parties, put in the seam scallop, beak, beard and stack, leaving the hole on the back. The chicken is turned on the front side, fill with the filler. Start lining details by semicircular sides. Insert a lining into a chicken. At the top edge, stitching lining and the outer side of the secret seam. Send eyes-beads.
The article uses the materials of the publication: "" Special issue of Lena-needlework magazine. CJSC "ID Kon-League Press", 2002. To fully familiarize yourself with the materials of the magazine, we advise you to acquire it from distributors or publisher.
We sew a chicken for Easter together. Eateup 1
Well, all are ready? Then begin!
Print the pattern (you can translate directly from the screen with a pencil). The chicken size should occupy the A4 sheet in height (in the landscape location of the sheet). The pattern of chicken is not my point, it is a kind of mix of two different chicken, which I found among the MK on Dulin.
Desrise: from the fabric of the vertex 2 parts, from the lining fabric 2 parts, wings- 4 parts, scallops 2 parts, bottomshot - two rectangles size a little more details.
We cut 2 parts of the carcass made of syntheps or other insulation, the allowance is minimal about 3 mm.
Approach the details of the carcass and the bottom (Singyppon can be applied to be robust). After the stitches, cut the donyshko on the pattern.
I don't carry small details, and the line along the edge of the pattern, fixing it with pins around the perimeter. We cross the wings completely around the perimeter, laying under the bottom of a piece of syntheps.
Sintepon on wings stalling close to the line. On the allowances at the point of deepening, we make cuts close to the line, on the places of convexities, put the penetrations. We cut carefully, not rebel. Scallop stachek on a curly slice.
Now neatly cut through one layer of fabric, the one that will be on the wrong one. Through this hole turn the wing. Be careful, observe the symmetry of the wings so that there are no two left or two right \u003d)
Babe on the scallop is cut very close to the line, in the corners (marked red) we make cuts to the line, turn out.
We fold the semed parts with a lining face to face, stitch (it is better to circle a pattern and strain exactly along the contour), leaving the hole at the bottom for turning. Punches also cut close to the line. With the bottom they do the same.
Soak all the details. So that the edges were smooth, when turned out, they need to "roll" between the fingers so that the allowances are as needed inside. The edges of the details are slightly affixed. Scallop I painted acrylic paint, since there was no suitable fabric. The photo still has a square - it is a blank for beak, square 8x8 cm.
We sew a chicken for Easter. Eateap 2
I cut the strip for the tail at an angle of 45 degrees. The bandwidth should be slightly larger than the width of the lace. Length - 60 cm, unnecessary can be cut off after climbing. The edges process Zigzag, I went twice. Stretch the edge when processing, then it will be wavy.
We put a keyboard.
We pave lines to large stitch to build tail parts. Since I have enough tough flashed as finishing fabric, I climbed the tail details separately, but you can pave a line for the assembly and aligning the strip.
I pull for the lower threads, the folds distribute evenly and fasten the zigzag along the edge.
Decorate the wings on your taste
One of the parts of the carcass sweat the rest of the body. From the front side, we sew their secret stitches to the adhesive. The ends of the details of the tail are sealing inside and below it is also sewn.
We cover the second part of the carcass, we rock and connect the details of the secret stitches, leaving the donyshko not stitched and the area on the back.
Dunyshko fix pins in four places, combining parts centers and also sew secret stitches.
Send the wings (I glued the crystal with glue), embroider (sew, glue) eyes. I found in the covers such here "surprised"))) on the breast you can make a decoration from a piece of lace, and you can simply tie a beautiful ribbon.
Our beauty is ready!
Now I want to look at your chickens, and I remind those who will show them on April 7-8 will receive postcards from me and small souvenirs! Successful sewing!
So, the final stage of the sewing of the Easter chicken-basket.
Chicken-basket
| And again about the chickens Spring came again, and here we are already preparing to meet a bright Easter - we take a dwelling, cakes, invent elegant patterns for Easter eggs. But - noticed? "Even remaining familiar white, in Easter day, these small symbols of the birth of a new life look especially purely, festively. And how touching will look and painted, and ordinary Easter eggs in a pretty patchwork basket! We offer you an interesting patchwork idea that comes from Japan, pass through Finland arrived at you. Natasha-Fihall. | |
| 2.
In my work, I used paper for freezing FREEZER PAPER)From which the templates cut out and which saves the time by helping the assembly accuracy. But in the traditional way with templates from cardboard, too, everything, of course, will work out. On the photo from the magazine and on the pattern there are options for color decoration. |
|
| 3.
We start with the selection of flaps harmonizing with each other: For the middle of the body ( detail A.); Contrast for head and tail ( details B. and FROM); for wings; And also for lining inside the basket. |
|
| 4.
By pattern, cut out of paper for freezing (or simple cards) templates. If you use paper for freezing, then all the details, except for the bottom, you need to cut two in the mirror reflection and must not be confused, they will mark them ah`, b-b`, C-C`. All templates cut out without drinks on the seams. |
|
| 5.
To the involving side of the fabric, the templates are suitable, leaving spacers. Do not forget that each item has a pair, but in mirror reflection. We cut all the details already with allowances. |
|
| 6.
We combine pins in the corners of the junction of the part A-B-C and A`- B`- C` and steal them on the patterns of templates. We have seams. |
|
| 7. You should have two facial sides of the sideline of the body ( we remind you! in mirror reflection). | |
| 8. Option. Head and tail ( details B. and FROM) You can make patchwork. Show it on the example of another similar basket. I cut the strips from assorted rags with a width of 3.5 cm (taking into account points of 7 mm), sew them into the strips and then cut 3,5 cm wide on the strips. Turn the blanks, choosing different combinations, and cross the strips into blocks again. For tail and head chicken ( details B. and C.) One side of the chicken is needed block 12x15 cm. We fit the patterns on the wrong side of the block so that the part of the head lay the painter, and the detail of the tail along the connecting line. Cut by adding allowances. |
|
| 9.
Return to our model. Billets of the body strengthen the gasket more. I took advantage of one-sided dense adhesive syntheps. Billets can be transported or decorated with a decorative braid, and then align parts by contours. |
|
| 10.
Now we take the fabric for lining - the inside of the basket. Strengthen it with one-sided adhesive flieselin. |
|
| 11.
Moving the details of the patchwork and a piece of fabric for lining face to each other, scrape pins and make together, focusing on the line of cut parts. It's good to capture a sintepon. It is also convenient to connect the details of the Zigzag, and not a straight line. In the middle of the bottom, leave a hole for turning. After the stratification, we cut the excess lining. |
|
| 12.
After both parts of the torso were turned out, rejuvenated, stitched holes in them, we had two blanks of the sidewall. Now we can attach the wings to each of them. In the photo of the wings are already sewn, but you just have to do the preparation of the wings. |
|
| 13.
Wings are sewn on each of the sides of the body, it means that we need to prepare two wings ( in mirror reflection). For each wing, suitable flaps fold in half the involve side. One of the sides (from the bend) can be strengthened with a glue thin fliesline or subtle synthesis, and on the other hand, they fit the pattern so that we have around 0.5 cm. Conspressure sandwich on the edge of the template. Do not forget to leave the hole for turning. |
|
| 14.
Cut the allowance, turn it out, weus, we are manually sewn. You can decorate the wings with a decorative braid and set. Or at the next stage of the assembly, use the drain at the same time and as a wing attachment to the torso (so done on our sample). |
|
| 15.
Rodyshko is shaved similarly. Only for it is better to take the syntreter's syntreter. |
|
| 16.
These are such blanks with us: two wings and bottom of the future basket. Now each wing is attached to the prepared details of the body. |
|
| 17.
On the inside of one of the details (from the lining side), we fix small stitches of the scallop, a keyboard and a beard. In our sample, these details are cut out of a soft felt. Then, with the front side, we make eyes - for this, beads or small buttons are suitable. |
|
| 18.
The scallop can be so - from a thick felt. And it is possible to scallop and a beard sewed from the fabric along the same pattern and fill a bit syntheps. And kevious to perform in the form of a folded triangle. |
|
| 19.
Now the final stage is an assembly that is performed manually. We need to prepare the shape of the basket. Pay attention to the marks in the patterns. We connect the halves of the torso from the top point on the tail up to the label ABOUT On the bottom and from the point of scallop to another tag ABOUT On the bottom. And between two labels ABOUT Just the dyshko stand (on its pattern, similar labels). Before crosslinking, it is especially thoroughly compatible to half a body with linings to each other, scraping pins. |
|
| 20.
Start sewing from point 1
At the tail and neat stitches go down to the tag ABOUT. Then we attach the bottom and sew one of his side-arc 2 up to the label ABOUT. Fix and tear thread. Return to the starting point 3
And they sew the second arc of the Donkey. They are joined at the point 4
The torso, from which then upwards it is convenient to continue to sew half the breast to the mark of the scallop. |
|
| Fill the basket of Easter treats - and the Nonaching is ready! Light Easter! New hopes! We will sew together! | |
| Such baskets we sewed in the classroom in the club. | |
The egg has long been a familiar Easter symbol, and Chickens on Easter- Natural continuation of this topic. Have you had to keep in your hands this small fluffy miracle of the sunny beam color? It is impossible to remain indifferent, so it is not surprising that we meet the chickens everywhere among the Easter decorations.
There are a lot of ways to manufacture them, and something new is added every year. Materials can be the most different - threads, fabric, paper, felt. You can choose what you are closer to you, and your children will be happy to take part in such creativity.
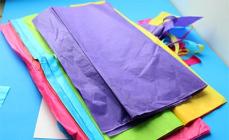
The easiest way make chicks for easterfrom paper. The material is simple, cheap and affordable, always in the house available, especially if there are children. It can be a figurine, a gift box, an application in the form of a panel or postcard. Finally, for kids, cute pictures can be printed on the printer - they will gladly paint them.
The same drawings can serve as stencils for appliqué, if you cut them into the components. And for the application you can use not only colored paper, no less beautiful will turn out. For a paper stencil, you can make a few printouts: Some cut on templates, and onto others paste details from colored paper. By the way, color printer paper is also quite suitable for this.
Small postcards will work well if you take a multi-colored block for notes. Something will serve as a background, and from those that yellow, cut out the appliqué details. Similarly, packaging for gifts is made. Just when printing the contour should be two, looking at different directions with a distance between them.

As always, skillful handles will be applied to empty tubes from toilet paper. If there are such tubes from the foil, they can simply be cut to the sharp knife into pieces of the desired length. We have a yellow paper tube, for the wings, we cut the square diagonally, we will make small details from red paper for scallop and beak.
It remains to glue everything in the right order. It is best to use a glue pencil for this. Even the thinnest paper does not spilt from it, and there is no danger to blame the glue if you are cracked together with the kids. Funny chickens on Easter do it yourselfit turns out of cardboard trays for eggs.
You need to carefully cut cells. For each box, we will need two of them, so that a company of five chicks will be obtained from the standard tray. Coloring the cells you have paint: acrylic, gouache or watercolor, trying to cardboard at the same time not splash. We give work to dry.
Connect the details of the box, placing a strip of paper on one side. Decorate the toy with the beak and paws of red. Inside, you can put a painted egg, candy or small cookies. In general, what will allow to put inside the size of the resulting product. Eye to our poultrys are drawing a felt-tip pen or stick made of black and white paper.

Chickens on Easter
Easy enough to manufacture and chicken from threads do it yourself for Easter. From the materials, we will need a cardboard for two circles, for which we will wrap the threads, the threads themselves (suitable acrylic, wool or semide of the middle thickness, naturally, yellow color), as well as red paper for keyboard. Circles make the size we need, differ in size.
The little pomponchik will be head, and the one is a bigger torso. Threads are better not to regret so that the pumps come out are not slightly, but quite dense. In detail the manufacturing process of this you will find in the appropriate master class. In principle, a cute chick is obtained from one pompon.
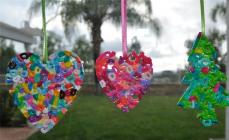
The main thing, then decorate it with a fantasy. Bows, hats corresponding to the shape box in the form of halves a broken shell or other entourage - and your bird will acquire uniqueness and individuality. You can spend your crafts on the chandelier or on branches and put such a bouquet on the table.

Make chicks for easter
Always enjoy popular chickens from Fetra to EasterAnd it is not surprising, because the work of such work is even for inexperienced craftsmen, just to be able to keep the scissors and needle in their hands.
Variations There are many. For example, a mum chicken with a baby in a basket looks great. The pattern is given, so you need to print and cut the partitions of parts or simply copy them by increasing the size to the desired, directly from the screen using tracing or loose paper. Then cut the details from the felt, we estimate them on the facial
side, slightly retreating from the edge. First we will produce small detail: scallop and paws, filling them with a synthet or hollofiber, and then stitched large, inserting small inwards insertion during stitching. With kids can be performed from the fabric.

And as a substitute for fetra, thin viscose napkins are suitable, which are sold in business stores and are quite inexpensive. Pieces also look good.
The body shape can be different: a circle, a triangle with rounded edges, an oval or egg. Before sewing half figures, enter the front side of the entire finish: aprons, wings, bows, grass, and so on that you decide to use, and also make eyes.
They can be made independently using beads, butchers, beads, although ready-made eyes are usually in needlework stores. Also make your eyes when knit chickens for Easter. Slowing halves, leave a small hole for packing. Felt or viscose napkins are not too elastic, so you should not make a tight pack, just to hint on the volume. Such a bird will serve as an decoration of the house, it will be a good gift to a child, can be used as a keychain on a school scale. The chick from the pumps or felt can be placed inside the native egg.

Knit chickens for Easter
And finally knitted chickens on Easter - This is the highest pilot. It is usually knitted from quite thin threads, so that the hook or needles need to be taken appropriate, so a person for whom it is at least the first can be taken for such a job, and it has some knitting skills.
In principle, if you had to knit the cap, then you will cope with a spherical torso and head, since you can imagine how to make and add, the complexity is only in a very small product size. But with legs and other small details to cope very difficult because of the small number of loops and the thickness of the tool and material. Exit - in mixed technique.

That is, if you are not sure that we can cope with the legs, connect the head and the torso in the form of balls with knitting or crochet, you can also perform wings, but make paws, for example, from a core (fluffy) wire or ordinary wire, which is wicked by threads , Gofrobumaga on glue or teip-ribbon of suitable color.
For beak and scallop felt fit, however, the crochet and they are not so difficult. Believe me, if you do everything carefully, the appearance of the toy does not suffer from it. It looks much worse. Roughly conjugated limbs look, if they lack their skills.
Amigurum Chickens for Easter: Scheme
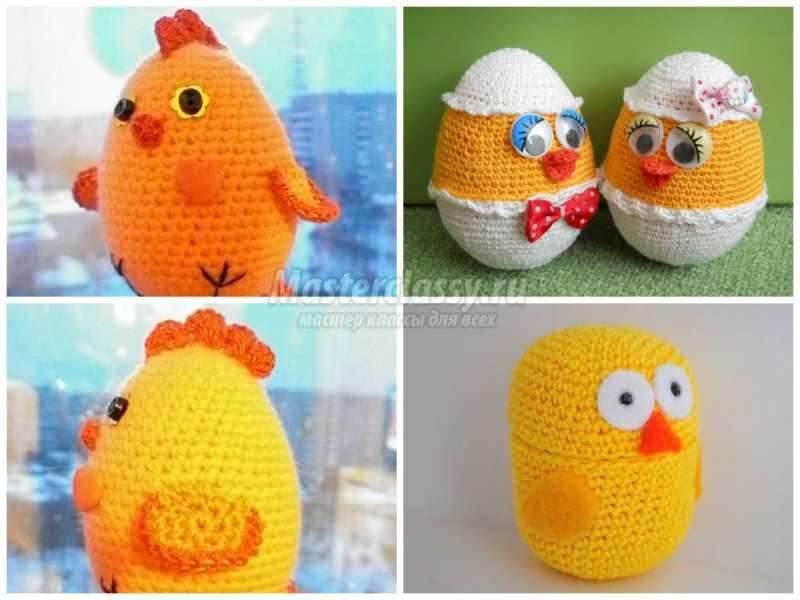
Crochet Chickens on Easterit is best to start with a fairly simple model to, as they say, fill your hand. We will only make the hatching chick with the remnants of the shell proposed by Master Anastasia. It consists of a head and torso bound by one principle, but differ in size. We will also have to raise the upper and lower shells, wings and keyboards.
For the manufacture, we will need materials:
threads for knitting yellow, white and some red, preferably one thickness
factory eye or beads suitable size
sintepon, silicone or other filler
and tools:
needle for stitching
adhesive gun or instant glue
hook corresponding to the yarn by number (better so that it is thick no more than 2.5)

We begin to confuse from the head and body. First of all, with a ring with amigurums from six columns without Nakid. The sequence of its execution you can see in the photo. This method of starting knitting allows you to tightly pull the circle, so that the holes are practically not left. Knit chickens on Easter Crochet Stakes without Nakid. In the second row above each art. B / N.
insert two tbsp. B / N.
In the third row, the increase in each second Art. B / N.
In the fourth row, the purchase in each third Art. B / N.
Fifth row: in every fourth st .b / n, they see two
To the sixth row, our knitting width is 30 columns, the additions for four rows do not do (6-10 rows knit the column over the column)
Eleventh Row: Groove in every fifth column

Twelfth row: in each sixth column we spread two of one on one on the thirteenth to the twentieth row inclusively knit evenly without add-ons of 42 columns in each row, and with a twenty-first row, we make a slumber, tiered through one column: in 21 rows knit five columns, and then the seventh, leaving the sixth unlimited
Further, descending: four and rolling, three and so on, while in twenty-fourth row we will not have 18 loops. Through the resulting hole tightly fill the filler figurine, after which we continue to reduce the number of columns until six of them remain in the 26 row. Finally pulling the hole, the thread will be fixed, and the tip will be pushing it into the chick.

Others like others like others Chickens Amigurums for Easter, Scheme The additions will be the same. May differ in the design of the paws, details, but the principle is the same. The wings knit in the form of a mug from Colza amigurum with one increase in each column in the second row. Third and fourth rows: 12 tbsp. B / N without add-ons. The finished circle is folded in half and insert over the edge, connecting it into one. Do not cut a thread, but leave a sufficient tail to use it to sew the wing.

Top knit shell, making an increase from the second on the sixth row, similar to how we knitted. There should be 30 tbsp. b / n. The seventh rod knit, alternating the groups of columns with the capes and without Nakid. They can be three or six loops. The edge is thus obtained by gear, uneven.
Similarly, the lower shell fit, but it is more in height than the top, so we make an increase, until 42 columns are formed in the seventh row. The following four knit evenly, without add-ons, and end with a toothed edge. For a keyboard, we make a ring out of six art., In the second row, we evenly add two more and then they see again eight st. B / N, leaving the tip for sewing. The assembly remains: to sew beaks and wings, as well as glue the head and torso shells.

Maybe knitted chickens on Easterto be made on the needles. The difference is small. Since the cloth in this case turns out to be more elastic than the crochet, it does not require such a rigid diagram of the additions and lifting.
The height of the row is less here, so we reduce or add a loop through a row or even less often. If the threads are thin, then you can finally pull up not six loopes, but from six to ten. But the beginning of knitting is also conducted from the ring amigurum, only we recruit eight loops, and then distribute them to four knitting needles.
If the thread is quite thick, you can start with six, distributing them on three spokes. The gear can be obtained like this: knit in the face, tied two facial together and follows the Nakid. A hole is formed under the navigation, and if the canvas be reset, the edge will be toothed. Another beautiful Easter idea is to make