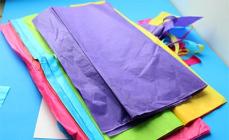
It allows you to develop the skills of handling scissors, improve the work of children's handles and make a kid more accurate. Each child will be able to make appliques from colored paper with their own hands, if you put the task before it.
Thus, the most accessible options for appliqués from colored paper for children of 4-5 years may be such:

Volume Appliques from Colored Paper
Ladybugs. Cut the two red circles and the black seized. Black dots are put on the circles, after which one circle is glued exactly above the black semi-alone, and the second bends in half and sticks to the first circle. We supplement the bug to the toy eyes and the mustache.

Materials for the applique "Ladybug"
We supplement the bug to the toy eyes and the mustache.

Applique "Ladybug"
Look at the video, how to make the applique "Ladybug" in another technique:
Applique from pieces of colored paper
Fox. Highly cut from a paper plate of a triangle, and the stapler attaching two triangles of orange cardboard to the circular edge. Then cover the plate with pieces of orange thin colored paper.

Fill the whole paper piece.

Triangles - Ears and Circles - Eyes

It remains only to attach round eyes - and chanterelle is ready!

Ice cream. Draw or cut out from colored paper cups for ice cream and glit a round molds for cupcakes like balls of cream-brulee. With these molds, other appliques of dishes can be made if you use them as a plate.

Applique "Ice Cream"
Applique of colored paper by template
Bunny. Cut in advance the ears pattern, head and triangular rose bunny, as well as a bush of grass, for which he will hide.

We collect a picture on a sheet of white paper, glit all the details and enliven the bunny to the toy eyes.

Applique "Bunny"
Polar bear. From white paper on the template, cut out a round body, head with ears, muzzle and bear paws.

Dorify the necessary details. Covered blue watercolor sheet of white cardboard, creating background.

Against this background, we collect our teddy bear and complement it with toy eyes.

Applique "White Bear"
Multilayer Colored Paper Appliques
As appliqués from colored paper for children of 5-6 years, it is possible to use more complex, multilayer, containing small parts, paintings. Preschoolers may well cope with the creation of such characters as:
Fish. Cut out the one-time plate with a triangular fragment, the remaining part is covered with "scales" - semi-hi-colored pieces of colored paper of different colors that need to be imposed, slightly going on at each other. The stapler attach the tail and fins, glue the eye. Ready!

Here is another fabulous fish with colored scales.

Dragonfly. From a thin paper, cut the trigise torso with head and eight multicolored wings.

We glue it all to the white sheet, we complement the image of the toys and toy eyes.

Applique "Dragonfly"
Application of colored paper and disposable plate
Choppers in the nest. Half a disposable paper plate glued to a sheet of cardboard. From blue paper, cut out three oval figures of chicks.

Cove the figures with lumps with a thin blue paper, and the nest is a decorative chips.

It remains only to glue the eyes of the eye and keyboards - and the applique is ready!

Crafts "Pillars in the nest"
In the appliqué "Autumn Tree" disposable plate serves as a background.

Applique "Autumn Tree"
Colored paper appliques for complex template
Girl in the rain. This application is built at work with complex templates for which you need to cut an umbrella, boots, head, dress, hair and girl handles.

What you need to cut for crafts "Girl in the rain"
We collect a picture on a sheet of blue cardboard, alternately gluing the details.

Applique "Girl in the rain"
Combined Colored Paper Applique
Chicken with an umbrella. This applique also implies work with templates, but if the kids are difficult to cope with such a task, templates can pre-prepare caregivers or parents.

Materials for crafts "Chicken"
We decorate the umbrella with a piece of translucent colored paper, which will make the image more interesting.

It will only take to collect a picture.

Applique "Chicken with an umbrella"
Volume Applique of Color Paper Slices
Flower. Cut from a disposable plate or a leaf of a cardboard of a flower circuit.

Cut small pieces from colored paper and roll them into lumps. One after another we glue lumps on glue.

Gently fill the entire flower space.

Application of colored paper "Flower"
Another version of the crafts is "sunflower". On a sheet of paper, draw the contour of sunflower. Cut the pieces of yellow and green paper.

Glit into the center of the black circle. We start to decorate with paper crafts. Before gluing a piece of paper, it is a little ferment - it will give the craft an extra volume.

Application "Sunflower" from colored paper.

Applique "Sunflower" from colored paper
Rainbow. It is made about the same way as the flower: the child is sminetting colored paper and gently lays it with rows, observing the sequence of flowers in the rainbow.

Applique "Rainbow"
Very beautiful in the technique, the volumetric applique of colored paper is autumn tree.

From pieces of red and pink paper, you can make the applique "heart". The basis take the heart from the cardboard.

Slightly ferment pieces and glue them to the base. Crafts will look interesting if you alternate red and pink lumps.

Excellent applications are obtained in the technique of terethery. Small papers are tightly alone to the other with a thin stick.

Here is such an aircraft can be folded from paper in the technique of alert.

Instead of glue, small pieces of paper can be recorded on the basis of plasticine.

Flat appliques from pieces of paper
Application from colored paper "Christmas trees" is done in a very interesting technique. Pieces of fine tissue paper are glued on triangular bases. At the same time, pieces can stick the edges of the eristies and stick together on another. Only after that the triangular base is glued to the pre-painted background.

Application "Christmas trees" from colored paper
Straw scarecrow. Appliqué is made in mosaic technique. We stick to the sheet cut over the hat and the head of the stuffed, teeping the body contours.

Materials for crafts "straw scarecrow"
The task of the child is to fill the torsch with pieces of colored paper, gluing them next to each other. The same pieces of yellow color lay the hair and beard stuffed.

Sunset. We lay the sand and purple sunset with pieces of yellow.


Post a landscape small palm tree.

Applique "Sea" from paper
Application with elements of quilling "Heart"
Appliques with queening or paper elements are very impressive. In order to make the applique we need colored paper, pencil, scissors and glue.

We do on paper scores about 1 cm wide and twist it into a roll. Cut the roll of cats. We must have paper curls, whose tips we fix glue.

We glue paper curls on a pre-harvested base - paper heart.

Decorating curls twisted green paper. Curls begin to resemble elegant roses framed by petals. We have an interesting applique in paper techniques.

Appliques from color corrugated paper
Application from color corrugated paper - "Vase with flowers"

Applique "Vase with flowers"
From color corrugated paper and wires, you can make a very effective postcard applique "Summer Polyanka." The technique of its manufacture is not very common. Around the easily attacious rod or wires are wrapped several times corrugated paper. The end of the paper is fixed by glue.

Squeeze paper on the wire. Cut off the excess part of the wire and we bring the ends. We must have colored thick sausages.

"Sausages" from corrugated paper
From such "sausages" lay down the application on paper.

From color corrugated paper, you can make a very beautiful wall panel with yellow flowers.

Paper plate is an excellent base for colorful appliqué. How do you make an idea from a free carrot bed with a paper plate?

Applique on a paper plate "Circling with carrots"
Very beautiful appliques are obtained if they are based on a watercolor painted background.

Application and drawing "Spring"
Using different techniques, and in its own way, uniting ideas, you can create unique pictures that will be the present manifestation of children's talent.
The fragible appearance of the application is convenient for small children who are just starting to create their first crafts from paper. Such work is considered safe for the baby, since they do not have to face scissors, they simply tear sheets on slices.
Consider examples of master classes with step-by-step instructions and stencils that concern topics.

In the younger group, and in the medium it is better to fill with ripped pieces of paper already existing drawing. For example, any coloring is taken with a large image and the desired number of copies is made or templates are printed.


Finely finely swear paper stripes. 
We glue them in the form of a mosaic on the prepared drawn figurine, leave the distance between pieces, it is not necessary to glue them close to each other.  Eye and spout cut adults or stronger, but from paper of another color.
Snowman in punching technology
Ripped technology implies not only that you just break the paper into small pieces. Step-by-step instructions in the next workshop will help to understand this business.
Phased performance:

Applications of paintings in pouring technique
For children, large works are suitable for children in the preparatory group, which are fully lined with torn elements. See what beautiful pictures will be your babies:  Optional to tear, you can cut on uneven flap:
  And this is for younger students a task for breaking complex elements:
  An example of work when there is contours, inside the filled neat and beautiful:
Sweeping equipment from napkins
Multicolored napkins that are torn to pieces will give appliques of airiness and ease.  The trees are wonderful, the trunk is done at will: cut out, draws or breaks:
  But the most beautiful is when you rush strips of napkins roll into arbitrary balls.
WATCH PUPPLICATION
Take cotton or cotton wheels, and let the children put them on the small flaps, which they later lay out their individual picture. Birds, beasts, flowers, snow, clouds will look beautiful and gently look.  Post step by step and glue the pieces of wool on the drawn figures.
 And for adult artists it is proposed to fulfill a large complex image of the whole:

VIDEO: Master classes of pouring applique
You need:
· sheets for drawing
· scissors
· glue
Work description:
Draw a large square on the white side of the sheet. His two parties coincide with the edges of the sheet, two other lines will have to spend themselves. Give your child scissors, hold the sheet yourself and direct it. After the carved square, you can make a triangular roof. So the house is ready, it remains only to smear with glue and pierce carefully to the paper. Cressing the item to the main background, remove the remnants of glue with a rag. Having finished the work, offer the baby to draw details, for example, designate the windows, the door, the auditory window, the fence. The children are very loved by the opening parts in the houses or caves in the rocks. Make such parts is very easy. At the bottom of the house you cut the door. One of her Party should hold it that loops. Of course, the door is not glued, but kept open. Now the child can close and open it. You can also make shutters on the windows opening the doors in the machines, the mysterious grots in the rocks.
Ripped color paper appliqué is one of the simplest but interesting crafts that can be created with your child. Usually for children, such a process is very exciting, because they do not need to be particularly attentive and neat when performing, they will simply need to be created. Such work can be passed to the contest of crafts or make for school wall newspaper if the parent has no time for the manufacture of another product. At the same time, the necessary materials can be easily found at home or in the nearest stationery store. Children's appliques that quickly and easily make out of colored paper, and with their own hands - a great type of joint creativity.
The article will present a few examples of work, which can be easily implemented with their child.
The most simply kind of ripped appliqué is an application with the help of a prepared sketch.
Mastery children's appliques from colored paper do it yourself for beginners
It will take:
- Colored cardboard
- Colored paper
- Adhesive pencil or pva
- Scissors
- Copy paper, if there is no possibility Print sketch
- Black marker or felt-tip
At the beginning you need to select a background of colored cardboard, it will print templates on it or translate them using a copy paper. Next, you should prepare a colored paper: cut it into small squares, circles, triangles, stripes, or just break into small parts. It is very important not to mix pieces of different colors together, but to decompose for convenience separately from each other. After that, apply the glue pva tassel on the background in those places where small paper should be glued. Please note that glue should not be glued, but the background! You can attach particles of torn paper on glue using a tweezers or needle, gradually filling the entire background, after which you circle the circuit with a black marker, draw the necessary items to complete the overall picture. When everything is completed, put the work under the press and dry.
Start with simple sketches, especially if you do work with a child of preschool age. For kids, it will be best to prepare small papers in advance.

Template for the manufacture of the second job:

Master class on the manufacture of appliqué "Owl" with phased photos
The set of materials necessary for crafts and tools remains the same: cardboard, colored paper, glue, scissors, only a simple pencil is added.

First of all, we must choose a background for our appliqué. We should have an image of night time, so we choose a cardboard from a dark colors palette: black or purple. A simple pencil draw a sketch (contour, outline) of the figure, which we want to portray, in our case, this is the Council.
The next step will be cut from brown paper a branch at which a bird sits, glue it to the cardboard under the owl. The twig can also be cut slightly thinner and stick to it small green leaves, which can be cut out of colored paper of green or napkins.
After that, we take the usual white sheet, we tear it into small pieces. We post them aside and go to the cardboard again. All that is inside the contour of our owls, by glue by a roof layer.
Our white paper sheets are glued to the cardboard, it will be a bird's fool. We remove the excess glue. It should work like this:

I bring an image of owl to mind. Cut your eyes, beak and paws from colored paper. To make eyes - cut out four circles: two small light gray or silver and two black even smaller. We glue to the Council first two large mug, and two small inside them, it will be pupils. From orange or red paper, cut the triangles and glue it to the place of the beak with a sharp end down. The paws can also be made from colored paper, attach them to the branch as if the Council sits on it, holding a branch with its curls. From yellow paper, cut out a month or a full moon, an asterisk and glue them to cardboard.
Here such a picture should turn out in the end:
Having mastered the skill of the application, the child will be happy, because he can make himself crafts at the exhibition to school or kindergarten, greeting cards for relatives and loved ones, depict the world as he sees him. The main thing is to teach your child to the Azam of this type of creativity, prompt how it will be better to do, file a few ideas, praise work to promote your child more.
Video on the topic
At the end of this article, we suggest you to see informative video master classes for the manufacture of children's ribbon applications for a visual example.
Techniques that are used for children's applications are very diverse. After all, you will agree that the usual gluing on paper of different figures of colored paper is quite monotonous and can quickly bother the child. It is possible to interest it again using interesting techniques of artistic creativity. The article contains different master classes in artistic creativity, the work on which, undoubtedly, will not leave the children indifferent.
Lily on the heart
Beautiful volumetric lily made by their own hands will decorate any card, replace the bow on the gift box or he will become a valuable gift. After all, the most expensive of them are those made by their own hands and from the soul.
Materials that will be required to us:
- color and white paper;
- cardboard;
- glue;
- scissors
- pencil;
- templates.
1. On the cardboard sheet, we will supply the heart pattern. We chose exactly this, but you can choose any other to your taste. If you do not get better with the drawing, you can print templates on the printer.


2. Cut the heart from cardboard and postpone.

3. On a white paper sheet, we supply the pattern-circle. Cut.

4. The second round should be slightly less than the first. Also we supply and cut out.

5. The latest circle is the smallest. We will make it yellow.

6. The next stage - we apply a special template with sectors to white mugs and won again.


7. On the workpieces we make cuts to the inner circle.

8. The cut parts turn the cule and glue, making petals.


9. We will also make a second workpiece.

10. We glue the basis first a large flower, and on top of a small one.


11. In the middle of the glue yellow small circle.


We get here such a lily on the heart.

Baby Children's Applique
Interesting torn applique of colored paper. It is performed very simple and accessible even the smallest. Also, no scissors will be required for it, because all the elements are rushing with bare hands. It will take:

- white paper sheet with harvested pattern-template;
- colored paper;
- glue;
- the pencils.
1. The template for work can be drawn by shifting a fantasy, and you can download anyone template that will enjoy and print. You can also use a children's coloring sheet. We have a deer.

2. Paradesome paint the background.

3. Full-finely thin sheet of yellow paper.

4. Introduce the breast and the abdomen with glue, gently glue the pieces of paper into these places.


5. Now you need to fill the torso and the head of the deer. To do this, take the brown paper and also the narration of small pieces.

6. Trying not to leave white places, fill out the contours of the animal body.
7. Here is such a beast turned out.

8. Now again take into the hands of pencils and apart the horns, clearly draw contours.


Work is ready.
Applique of tenderloin on the example of a vase
Another option of needlework for children can be a collage of magazine clippings. In addition to cutting and gluing the necessary elements, then the child will also learn how to select the desired colors and shades for the collage, according to the sketch, or guided by fantasy and artistic vision. Such work will also help the child to feel the work of the artist, to understand and imbued with painting.
1. To begin with, make a sketch of work. It will be a vase with colors in the foreground, and in the rear eyelid window or landscape.


2. We take glossy magazines, looking for the elements of the necessary, for the incarnation of sketch into life, colors. To begin with, we will deal with the center - colors.


3. Create a surroundings - wall, window.


4. By gluing a piece by piece, depict the table and a vase on it.

Collage of glossy cutout ready.

Children turned out such work:


