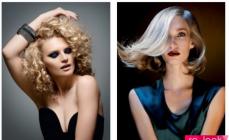
Modeling a beautiful hairstyle is an integral stage of creating a fashionable image. What devices are used in home care, how to use them correctly without harming your hair for the benefit of styling? Let's repeat the common truths and learn the intricacies of the work of hair stylists!
To determine the most effective heat styling method for you, determine your own hair type. Experts divide them into three groups: European, Asian and African. This type of division is based on differences in the cross-sectional shapes of the hair. For example, the European type implies an oval cross-section. This type of hair is soft and grows at an angle to the head. Asian hair type has a round cross-section. Such hair grows at right angles, has lush volume and is quite stiff. It is sometimes difficult to place them. African hair type is characterized by a flat section, due to which it curls in tight curls.


Representatives of the fair sex who have European hair type, you should be very careful about your own hair. Naturally thin hair should be styled exclusively using heat protectants and cosmetics against split ends. It is better to shape your hair with a hairdryer, alternately using cool and warm air.
For african hair type The most preferred styling is using an iron. It is advisable to purchase the latter with the function of setting the temperature level. The coarser your hair, the higher it should be. Excellent styling can be achieved by applying a special mousse to damp strands. Comb them with a comb and let them dry naturally.
Hard asian hair will become more obedient if their wishes are taken into account. They should be washed no more than once every three days, using organic shampoos containing moisturizing ingredients. Blow-drying this type of hair will not please you much, but shaping it with curling irons will be beyond praise. Please note that styling products do not contain alcohol; it is contraindicated for this hair type!


A few words about styling products

Regardless of the effect you want to give to your hair, apply styling products at least five to ten minutes before styling. The range of this period of time is determined by the structure of the hair cuticle, which requires time to completely absorb the product. The preparation carried out will allow you to make the most of the capabilities of styling products.
To ensure that the efforts made to create a wonderful example of hairdressing are not in vain, pay attention to the level of fixation of the styling products. Brand manufacturers adhere to a digital scale indicating the level of hair fixation from one to five. A light and normal degree of fixation, indicated on the product label by a number from one to three, is suitable for thin and weakened hair. Thick and curly hair requires strong and super-strong fixation products, regulated in a range of four to five.


Hair styling with a hairdryer, styler

Using these devices, you can dry and style your hair, creating light curls, straightening it and adding volume. The higher the power of the hair dryer, the easier and better quality you will style your hair and the less damage you will cause to it. Hair dryers with high power tend to have lower air temperatures than identical models with lower power. For those with permed hair, it is very important to use a diffuser attachment when styling your hair, which disperses the hot stream of air, thereby minimizing the potential harm of the device.
A guide to blow-drying hair
Hair drying should begin with hot air and end with a cold jet; during styling, hot and cold modes should be used alternately. It is recommended to keep the hair dryer at a distance of at least 15 centimeters from the head.
It is necessary to dry the strands from roots to ends, first the bottom layer and then the top layer.
Direct styling is done when the hair is half dry. At this time, styling products are applied to them.
To style short length hair, use a small diameter brush or brushing attachment. Long hair will need a wider brush. The diffuser attachment will help add volume to medium and long hair at the roots and create beautiful curls.


Hair styling by world famous stylist Richard Ward

Hair styling with curling irons

Tongs and curling irons are used on dried hair, previously protected with special products. Different shapes of curls are created by twisting hair from the roots or from the ends, horizontally or vertically, in one direction of twisting or alternating with the opposite. In addition, the diameter of the curl is determined by the width of the working surface of the device.
Reminder for styling hair with curling irons and tongs
Apply a heat protectant to your hair. To give your hair extra volume, use mousse.
Set the device to an acceptable temperature. For thin, damaged or colored hair, it should not exceed 160 degrees. You should hold your hair with the device for no more than ten seconds.
For a voluminous hairstyle, when styling, twist the strands in different directions, not too tightly.
For volume at the roots, hold the strand in this area for about five seconds and then begin curling the ends.
Once your hairstyle is complete, wait ten minutes and comb your hair with a wide-tooth comb. Fix the result with varnish.


Hair styling with straightener, iron

Depending on the length of your hair, you should choose a straightener model. The longer the hair, the wider the surface of the device should be. The narrow surface is ideal for styling bangs and short hair. A wide straightener will allow you to grip wide and thick strands of hair, a narrow straightener will allow you to grip thin strands. If you plan to use a flat iron as a hair curling tool, purchase a device with a rounded curling iron. To avoid drying out your hair in your daily care, use straighteners with ceramic or Teflon coating. Don't forget about the need to apply heat protectants. Hair must be completely dry for styling.
Reminder for styling hair with straighteners and irons
Straightening. Divide your hair into several horizontal levels, secure the top ones with clips on the top of your head. Perform straightening starting from the back of the head. Move the iron quickly and very carefully. At a low temperature level of the device, it is allowed to iron one strand twice; at the maximum level, only once is needed. Style your hair from the back of your head to your face, gradually lowering the levels from the crown. The bangs are put in at the last minute.


Curling. Do the preparatory work - dry your hair, apply a heat protectant and styling product. Section your hair as above. Take a thin strand at the back of your head, clamp it between the plates of the device and make one turn around it. After this, smoothly and slowly move the iron downwards from the root to the ends. As a result, you will get a naturally wavy curl without excessive hairdressing gloss.


Be beautiful!
Photo: allseason.ru, ladykiss.ru, womensnote.ru, hochu.ua, todchuk.ru, pocaz-mod.ru
Some modern hair styling methods involve the use of tools such as a hair dryer, curling iron or flat iron. They are extremely popular because they allow you to create a beautiful, stylish look in a matter of minutes. Curling iron or tongs It’s worth clarifying right away that such a device requires certain skills. Therefore, you will have to practice creating a certain shape several times before you get the perfect result. In addition, like any methods involving thermal exposure, this one also requires the prior application of a thermal protective spray or cream. In any case, it is not recommended to use a curling iron too often.
Having placed the strand between the plates, wrap it around the device and leave in this position for several seconds. Keep it horizontal if you want classic curls. For spirals, place the device vertically. Holding it at an angle of 45 degrees, you will be able to form oblique curls that look original and stylish. For long-lasting results, do not straighten the curl after warming up. Lock it in this position. When the latter has cooled, carefully remove the clamps. Correct with your hands and spray with varnish.
SECTION 2 HAIRDRESSING TECHNOLOGIES USED IN THE “IDEAL” HAIRDRESSING SALON WHEN PERFORMING A SPIRAL PERM ON MEDIUM-LENGTH HAIR
Technology for performing spiral perm on medium length hair
Perm procedure (see APPENDIX B)
The hairdresser carefully examines the hair and scalp before curling, selects the appropriate product, and determines the structure and quality of the hair. At this stage, it is important to correctly determine the type of previous hair treatment and the method of applying the chemical composition.
He washes his hair with deep cleaning shampoo, without massaging the scalp - this further allows you to open the hair scales and speed up the penetration of the chemical substance.
A strand of hair is separated in the form of a square (starting from the lower occipital area), twisted into a rope and wound in a spiral onto a bobbin. In this case, the turns of the spiral are placed close to each other. The direction of twisting the tourniquet and the direction of winding it onto the bobbin must coincide. Having completed curling the entire mass of hair, apply the composition, carefully working out each bobbin with a foam sponge. Finally, put on the plastic cap.
The time of exposure is determined experimentally; for this purpose, four bobbins are untwisted in each area of the head and the result of the effect of the composition is checked. If the curl is elastic enough and holds its shape, you can move on to the next stage. Rinse your hair (without removing bobbins) with warm running water. The procedure should take place within 5-7 minutes.
For fixation, hydrogen peroxide is used in a concentration of 3-5%; in order for the composition to gain viscosity, add a small amount of shampoo. Lather the preparation with a sponge and treat each bobbin. After 7-10 minutes you can start unwinding the curlers. After removing all the bobbins, repeat the application of the fixer. After 5 minutes, rinse your hair with clean water without any cleansing cosmetics. Neutralizing perm chemicals have a pH ranging from 8.5-9.5 and act as an alkali. A small amount of product on the hair leads to its destruction. As practice shows, even thorough and repeated rinsing of hair with running water does not completely eliminate the alkaline effect.
The neutralization stage involves the use of a weak solution of citric or acetic acid, in which hydrogen ions H+ predominate. The higher their concentration in the solution, the lower the pH of the environment.
OCCUPATIONAL SAFETY AND HEALTH
One of the points of safety regulations is the organization of the workplace. On the master’s desktop, disinfectants are located on the left, and working tools on the right, in the order in which they will be needed. Power tools are in the drawers of the nightstand.
The cleanliness and neatness of the master himself is very important (clean hands, no rings, bracelets, watches), disinfected tools, spotlessly clean linen and protective negligee.
When performing a hairstyle, a number of services were performed using cutting tools (straight and thinning scissors), power tools (hand hair dryer, electric curling irons), equipment (sterilizer), when working with which you need to be very careful and attentive.
Tools and devices must be clean, as required by sanitary, hygienic and ethical standards. Instruments can be disinfected using ultraviolet sterilization, quartz sterilizers and high-pressure sterilizers.
When working with hot water, be sure to monitor its temperature.
Disinfect instruments in a timely manner.
To prevent instruments from becoming a source of infection, they must be periodically disinfected. There are two types of disinfection:
Sterilization and disinfection.
Sterilization is the most effective way to kill bacteria using high temperature. To do this, use a box that closes tightly - an autoclave.
Disinfection is the destruction of bacteria using special solutions - disinfectants. Some of them have only bactericidal properties (destroy bacteria), others are fungicidal (destroy fungi), and still others have both qualities.
Disinfection methods are carried out using mechanical, thermal and radiation means.
Mechanical means remove, but do not destroy, microorganisms. These are cleaning, wiping, washing, washing, shaking out, sweeping, airing. When using a vacuum cleaner, up to 98% of microorganisms are removed. Ventilation is effective enough when its duration is no less than 30-60 minutes.
Thermal means are based on the use of high and low temperatures, namely: hot air, steam, boiling, pasteurization, burning, burning, freezing, drying. Ironing is a disinfectant, but it acts primarily superficially. Freezing does not lead to the death of microorganisms, but leads to a decrease in their number over time.
Drying for a long time leads to the death of a large number of microbes.
Chemical disinfection methods are widely used in practice. They are based on the use of various chemicals that kill microorganisms. Chemicals have different effects on microorganisms:
Bactericidal - the ability to kill bacteria;
Bactriostatic - suppress their vital activity;
Virucidal - the ability to kill viruses;
Fungicidal - the ability to kill fungi.
Among chemical disinfectants, a distinction is made between mild disinfectants used to disinfect the skin of hands, clothing, and linen, and strong disinfectants used to disinfect highly contaminated materials.
For cuts, use hemostatic agents.
When dyeing hair or doing other work with chemicals, be sure to use rubber gloves.
A first aid kit and instructions for providing first aid to victims should be available.
When using cutting tools you must:
Store closed in a special case or cover;
Do not pass it open and only rings first;
Do not store them in pockets;
Use only as directed.
When working with power tools you must:
Check the serviceability of the tool and the integrity of the cord before work;
If any malfunctions are detected, work must be suspended until they are eliminated;
Do not handle the tool with wet hands;
Do not connect to a network not intended for electrical appliances;
When changing attachments in electric tongs, turn off the power supply.
prohibited:
Disassemble power tools and make any repairs yourself;
Use alcohol or substances that contain alcohol to clean instruments that have heating elements;
Do not store flammable and combustible substances in close proximity to heating devices;
Even when leaving the workplace for a short time, it is necessary to turn off local lighting and electrical appliances;
All electric heating devices must have fireproof bases.
When using hair treatment products and decorative cosmetics, you must always check their expiration date, and under no circumstances use expired products.
CONCLUSIONS OF THE STUDENT ABOUT COMPLETING THE PRODUCTION PRACTICE
During my internship at the Ideal hairdressing salon, I realized that a hairdresser is a real artist who works on each person as his own canvas. Every person wants to look more beautiful, and hair is the best decoration of a woman. By changing your hairstyle, you can change your style, your image, and transform your appearance. The role of the hairdresser in creating an overall harmony of lines, taking into account the individuality of the client, is sometimes decisive. I completed an internship at a hairdressing salon in order to ensure a direct connection between my training and my professional activities.
Deepened and expanded theoretical knowledge, strengthened practical skills and abilities. I studied the activities of a hairdressing salon, learned how to quickly and almost accurately perform hairdressing services, taking into account the rules and requirements for their implementation. She consolidated her practical skills as a hairdresser and worked on technological techniques.
APPENDIX A
Technology for performing women's haircuts "Cascade"


Technology for performing men's haircuts "Polubox"


Hot hair styling technology

APPENDIX B
Technology for performing spiral perm on medium length hair


Required prior knowledge:
Styling hair with curling irons can be classified as hot styling. The curl is formed due to temperature.
The styling result depends on the diameter and shape of the curling iron, the length and thickness of the hair, the time the strand is exposed to heat and the style of hairstyle. The thicker and longer the hair, the thinner the strands need to be separated in order to create a high-quality curl.
Using curling irons, you can perform voluminous styling of all hair, partial curling of strands, or create curls only at the ends of the hair.
Preparatory work:
Wash and dry your hair.
Technology for making curls using the “down” method:
Comb your hair;
Separate the first strand of hair in the lower occipital area with dimensions: length of the base of the strand 2 - 4 cm, width of the base of the strand 1 - 4 cm (depending on the length and thickness of the hair);
Bring the tongs to the base of the strand and grab the strand, warm the strand by passing it through the tongs several times;
Pull the pliers away from the place where the strand is grasped by 1 – 2 turns;
Make 1 – 2 turns with the tongs towards the base of the strand, holding the ends of the hair with the fingers of your left hand and pulling them slightly;
Often open and close the tongs slightly, continuing to pull them away from the base of the strand so that untreated sections of hair fall into the working part of the tongs;
When the ends of the hair are caught between the groove and the roller, stop pulling and carefully remove the tongs;
Secure the finished curl with a clip.
Technology for making curls using the “up” method:
Grasp the strand with pliers so that the groove is located on the master's side, and the roller is located on the side of the base of the strand;
Warm up the strand and pull the tongs away from the place where the strand is grasped by 1 – 2 turns;
Technology for making curls using the figure eight method:
This method is used for hair 20–35 cm long. Comb the hair thoroughly;
Separate part of the hair to curl one curl;
Warm up the strand and grab it by turning the tongs half a turn towards you, while immediately making a full turn with the tongs. When stopping, the roller should be turned towards the base of the strand, and the groove towards the master, the left hand slightly pulls the strand of hair;
Pull back the tongs and make another turn;
With your left hand, bring the ends of the hair down on the other side of the strand;
Thus, with each new turn, the ends of the hair change their position, being either to the left or to the right of the twisted strand.
Technology for making curls using the “spiral curls” method:
Comb your hair, divide it into strands;
Warm up the strand and pull the tongs away from the place where the strand is grasped by 1 - 2 turns, hold the tongs with an inclination of 45° to the base of the strand;
Curl your hair in a spiral, holding the end of the strand with your left hand and slightly pulling it;
Continue winding until the end of the strand is between the groove and the roller.
PLAN
Introduction
1. COLD HAIR STYLING
2. STYLING HAIR WITH TONGS
2.1 Styling curls
2.2 Types of curls
2.3 Ways to style hair into curls
2.4 Styling hair in curls using the “Down” method
2.5 Styling curls using the “Up” method
2.6 Styling curls using the “Figure Eight” method
3. STYLING WITH CURLERS
4. HAIR STYLING WITH A HAIRDRYER
4.1 Blow-drying hair for small volume hairstyles
4.2 Blow-drying hair when doing hairstyles with the effect of sticking hair
4.3 Blow-drying hair when performing hairstyles with increased volume
4.4 Blow-dry your curls
BIBLIOGRAPHY
INTRODUCTION
Curling hair for a short period of time is called styling. Hair styling consists of many operations that can be used to create hairstyles of any shape. Hairstyles resulting from hair styling are short-lived. They retain their shape for a maximum of 3-4 days. When wetted with water, the hair develops and takes its original shape.
The retention time of the style depends on the shape of the hair and its cross-section, which are not the same for different hairs. The shape can be round, oval or ribbon-shaped. The more the cross-sectional shape of the hair differs from round, the more curly the hair is. When styled, this type of hair retains its style for a longer time compared to straight hair.
The physical properties of hair that affect the safety of the hairstyle include its tensile strength, elasticity, and resilience. When wet, the strength and elasticity of hair are significantly reduced, while elasticity increases. In addition, when the hair is wet, its length also increases. When dry, they return to their original state. These properties are very important. Cold hair styling is based on these properties.
For example, if wet hair, which is therefore longer than dry hair, is curled in curlers, then during the drying process it is subjected to compressive forces, which contribute to a reduction in hair length. But since the hair is not in a free state - it is wrapped in curlers - it will not be able to fully restore its length. The action of compression forces occurring during the drying process of hair will lead to a temporary and slight change in the shape of its cross-section and an increase in hair length.
Hair of medium thickness and stiffness returns to its original state usually after 5-7 days. This period of time varies accordingly depending on the property and condition of the hair.
Today, hair styling is carried out in several ways:
Cold method - without the use of curler clips;
Using curlers and clips;
Using a hair dryer;
Using a hot curling iron.
1. HAIR STYLING COLD WAY
Hair that is elastic and soft, and also with an oval cross-section, lends itself well to cold styling. Hair that is hard and elastic is very difficult to style using a cold method, and a hairstyle done on such hair lasts much less time.
Let's master the technological process of cold styling with the direction of the hair and the first wave to the right (Fig. 1).
After combing the strand, the hair is pressed on the right side with the middle finger of the left hand, 3-4 cm from the base. Then take the comb in the right hand in the third way and insert it with the frequent side of the teeth into the hair close to the middle finger and parallel to it. The teeth of the comb are positioned perpendicular to the hair strand. Next, by moving the comb along its plane, the hair of the captured part of the strand is shifted to the right by 1-1.5 cm. When moving the hair to the right, the first wave line is formed between the middle finger of the left hand, pressing the hair, and the comb. After the crown is formed, without removing the teeth of the comb from the hair, tilt its edge towards you by about 45°, and with the index finger of your left hand, firmly press the hair between the comb and the already formed wave line. At this moment, the index finger of the left hand should slide along the outer side of the comb from the edge of the comb to the ends of the teeth. Considering that the comb is at an angle of about 45° to the strand, the index finger of the left hand, sliding down its plane, will simultaneously compress the wave line so that the latter will be between it and the middle finger. Next, comb the hair located below the index finger of the left hand.
The left side of the strand is pressed with the middle finger of the left hand at the same distance from its base. This is necessary so that the wave line of this side of the strand coincides with the line made.
After this, a comb is inserted into the hair and by moving it to the right, the resulting crown is connected with the existing one on the right side of the strand. After this, just as in the first case, tilt the head of the comb towards you, and with the index finger of your left hand, at this time, press the hair between the comb and the wave line and comb the hair from your finger. After the formation of the first wave line across the entire width of the strands, the second line begins.
The second line begins on the left side of the strand. To do this, step back from the first line by 3-4 cm and pinch the hair with the middle finger of your left hand. Then the teeth of the comb are inserted into the hair close to the middle finger and, with a movement to the left, a second wave line is formed. Next, press it with the index finger of your left hand and comb the hair, starting from the finger. After this, they move to the right side of the strand and use the same techniques to finish the second line of the wave. Thus, the first wave is obtained, limited by the upper (first) and lower (second) crowns.
Subsequent waves are processed using similar techniques. Moreover, each subsequent wave begins on the side of the strand where the wave will be directed.
The direction of the wave itself depends on the direction in which the hair moves with the comb when the first crown of any wave is formed.
The last wave is processed differently: after the last crown is formed, the ends of the hair are combed from the index finger of the left hand not down, as usual, but in the direction where the hair would need to be moved with a comb to form the next crown.
Now let's get acquainted with the technological process of performing a hairstyle with a side parting. After wetting the hair with a special composition, they are combed and parted. If the parting is on the left, processing begins on the right, and vice versa. Particular attention must be paid to the location of the protruding waves. Considering that the side parting divides the scalp into unequal parts, the number of waves on them will be unequal.
Having approximately determined the required number of waves and the order of their placement on the scalp, proceed to styling. Step back from the parting by 3-4 cm and pinch the hair with the middle finger of your left hand. If it is necessary to obtain a sharper reverse frontal wave, its processing begins 5-6 cm from the parting. Then insert the teeth of the comb into the hair at the middle finger and move it to the left to give the hair the desired direction from the forehead. Next, tilt the head of the comb towards you, and use the index finger of your left hand to press the hair at the formed wave line. After this, carefully comb the hair, starting from the index finger. In this case, it is necessary to ensure that the lower layers of hair are well combed. Then move the middle finger of the left hand 3-4 cm from the resulting crown and press the strips with it. Insert the teeth of the comb into the hair at the middle finger and point it to the right. In this case, you should remember that when moving the comb to the right, it is advisable to start processing the section of hair on the right side of the section.
Having completed the processing of the second crown of the reverse frontal wave, they practically begin to perform the protruding frontal wave. It is on it that the index finger of the left hand is located at this moment. All methods of its development are similar to those discussed above.
When performing cold perm hair styling in waves, special attention should be paid not only to the order of the waves on the scalp, but also to the exact connection of the wave lines on the left and right sides of the head. Depending on the hairstyle model, these lines are connected in different ways. In a side-parted hairstyle, the waves usually meet at the back of the head. In this case, the second crown of the first wave of a larger section of the scalp is connected to the first crown of the first wave of a smaller section. Thus, the first wave of the smaller segment will be connected to the second reverse wave of the larger one, and the second wave of the smaller segment will be connected to the third reverse wave of the larger one. Consequently, if the wave on one part of the head is protruding, then on the other it will be reverse.
If the hairstyle is parted in the middle, then the arrangement of the waves is completely different. A straight parting divides the scalp into two equal parts. Therefore, the number and arrangement of waves should be symmetrical, that is, the waves on the left side of the head should not differ from the waves on the right side, but connect the waves on the back of the head. In this case, the first backward wave of either side of the head is connected to the first protruding wave of the opposite side.
The process of making waves in hairstyles without a parting is no different from that discussed above. The waves on the back of the head are connected in the same order: the protruding waves of one side of the head with the reverse waves of the other side. The main direction of combing hair is from the face to the back of the head.
In a hairstyle without a parting, the shape of the waves in the areas of hair that frame the face is different from the shape of the waves at the back of the head. The waves coming towards the face have a more narrowed shape and widen in the occipital areas.
Considering that a hairstyle without a parting is usually characterized by a sharp bend in the crown line of the first wave, it should not be performed with the entire plane of the comb teeth, but only with its end.
After making waves in all areas or parts of the hair, a net is put on the head, which will protect the shape given to the hair when drying.
2. LAYOUT KA HAIR WITH TONGS
In order to learn how to master a curling iron perfectly, you need long, systematic training. The master must be able to hold the tongs correctly in his hand, as well as quickly and easily rotate them in the palm of his hand both clockwise and counterclockwise while squeezing and unclenching the working parts.
You need to hold the tongs with your right hand, with the handle of the tongs lying on the palm, placed between the thumb and forefinger. The working part of the forceps should be located on the side of the thumb and index finger.
If you need to turn the forceps clockwise, they are placed in their original position in the right hand and begin to turn with the entire hand of the right hand.
So, you need to master the techniques of using tongs so much that you can easily, effortlessly turn the tongs in any direction, leaving the working part closed, and also open and close them simultaneously with turns.
2.1 Styling curls
Despite the huge variety of existing hairstyles, their main elements are waves and curls. Changes in their appearance or relative position also lead to changes in hairstyle.
The hairstyle is made only from waves or only from curls - in any case, it can be original and unique. But the most popular hairstyles are those that combine waves and curls. The alternation of these elements, as well as their modification in individual areas of the scalp, gives each hairstyle its originality and originality.
2.2 Types of curls
According to their shape, curls are divided into several types: straight or simple, oblique, descending, vertical, crumpled and parallel in several rows.
Straight curls are considered to be curls located horizontally. If they are located in several horizontal rows, they are already called parallel.
Oblique curls. On the scalp, heads are usually located at an angle of about 45° to the vertical or horizontal.
When creating a hairstyle, crumpled curls are laid in such a way that their base has the appearance of a wave, moving further to the ends of the hair strand into a curl.
Curls whose ends come down from their middle in a spiral are called flowing curls. To create such curls, you need long hair - at least 20-25 cm.
2.3 Ways to style hair into curls
The downward curling method allows you to create a variety of hairstyles, although they all look a little heavy and monotonous. When curling using the “down” method, it is recommended to make the curls smaller and lighter, because with large curls the hairstyle will look rough.
Curling your curls in an “up” manner, on the contrary, gives the hairstyle lightness and airiness.
But due to the fact that curls curled up create a large wave when combed, it is not always convenient to use this one method.
Curling curls using the figure eight method allows you to create hairstyles only with fairly long hair. This curling method provides the hair with the greatest strength.
The most ideal conditions for curling hair are those in which the hair is twisted onto a tool, be it tongs, curlers or bobbins, perpendicular to its axis of rotation. This makes the curl elastic.
For curling, the thickness of the base of the hair strand should not exceed 4 cm. This condition must be met so that the hair is evenly heated. At the same time, the hair strand should not be too thin. When curling your hair into curls, you have to take into account not only the thickness, but also the length of the strand. The longer the hair strands, the thicker their layer when twisted onto the curling iron. In this regard, it is necessary to be able to adjust the length and thickness of the strand depending on the length of the hair. The longer the hair that needs to be curled, the thinner the strand of hair you need to use for curling.
Before you start curling your hair with a curling iron, you should prepare the necessary tools and equipment. To perform it you need: forceps of the required diameter; a metal or horn comb, i.e. one that does not melt under high temperature.
To curl your hair into curls, you will also need thin pins or clips to secure each curl after curling. Before curling, apply styling mousse to your hair along the entire length of your hair.
Have you ever wanted to get a new, amazing hairstyle for a special occasion? It is very easy! Prepare a heated electric hair curling iron - and a cascade of flowing curls is guaranteed (Fig. 2).

Before curling, apply styling mousse over the entire length of your hair - and you're ready to go!
1. Heat the tongs first. Then part your hair into sections, starting from the back of your head. Take a strand of hair 4-5 cm wide and curl it with curling irons.
2. Carefully release the spirally twisted strand and secure it in the middle with an invisible lock. Continue in the same way until you have twisted the last strand.
3. Release strands of hair, starting from the back of the head. To give your hair more volume and naturalness, separate the curls with your fingers along the entire length.
4. Grab a large strand of hair from both sides of your head with your fingers and twist it loosely to the very ends.
5. Now connect both strands and secure them with bobby pins at the back of your head.
6. Arrange the rest of your hair so that it falls down your back.
7. Take a little wax with your fingers and, pulling a few curls, run your hands along their entire length.
2.4 Styling hair in curls using the “Down” method
Curling hair into curls using the “down” method is performed as follows. A quarter is separated from the total mass of hair. This is done in this way: first, the entire strand is divided into two parts in width, then one of the halves is divided in half again, but not in width, but in thickness. The first top curl should be curled from the outer layer of hair. When curling hair into curls using the “down” method, the roller of the curling iron is located at the bottom, and the groove is at the top. In this position, the tongs are brought to the base of the strand.
At the moment of grasping a strand of hair with the working part of the tongs, they must be turned half-turn towards you. With this position of the tongs, there will be no bending of the strand at the point where it is grasped by the tongs, i.e., the edge of the groove of the tongs will not leave a transverse mark on the strand. It must be remembered that this position of the curling iron is mandatory at all stages of hair treatment with curling irons.
A strand of hair must be grabbed with tongs directly at the place where you want to place the curl. As soon as the hair is inserted between the groove and the roller of the tongs, you need to lightly squeeze the handles of the tongs and pull them back. During the pull, the hot tongs seem to stroke the hair and warm it up slightly. As a result of this procedure, the hair becomes more flexible. Typically, the tongs are pulled away from the place where the strand is grasped at a distance corresponding to one or two turns. Immediately after this, you need to make one or two turns with them, so that the tongs are in the place of the strand where the curl should be located. At this time, the fingers of the left hand hold the ends of the hair, slightly pulling them.
Now the curled part of the hair is processed. The tongs are opened slightly and then closed. This movement, repeated often and quickly, helps to evenly distribute the hair over the working surface of the curling iron and heat it to its full thickness.
The tongs must be pulled back to such a distance that will allow them to return to their previous position in one full turn, i.e., to the place where they initially grabbed the strand of hair. These movements should be repeated in the same order until the ends of the hair are caught between the groove and the roller. At this moment, you should not do any pulling.
Finish curling the curl as follows: turn the curling iron towards you in the direction of curling the curl until they begin to scroll through the curl freely, without resistance. At this point they can be carefully removed. In this case, you need to make sure that the ends of the hair remain in the middle of the curl.
To prevent the curl from developing, it must be secured with a clip. If this is not done, then under the influence of its own gravity, while still hot after curling, it will certainly sag.
After this, you should begin curling the next curl. The entire strand of hair is curled in this way. In this case, the main attention should be paid to ensuring that all the curls of the first row are located on the same straight line (horizontally), and the curls of the second row are below them.
Depending on the hairstyle, the curls may be positioned differently. But at the stage of mastering the skills of curling with curling irons, first of all, it is necessary to achieve the ability to position them symmetrically.
2.5 Styling curls using the “Up” method
Curling curls using the “up” method differs from the described method of curling curls “down” only in some details. The main difference is that the tongs should be applied to the strands with the groove facing down and the roller facing up. At the moment the tongs grab a strand of hair, the tongs must be turned so that the groove is located on the outside, and the roller is located on the side of the base of the strand.
In the process of grasping a strand of hair with a curling iron, you need to turn it upward one full turn, and then begin working on the curl, while simultaneously pulling. When curling the curls using the “up” method, they are divided into strands in the same order as described above.
2.6 Styling curls using the “Figure Eight” method
To curl your hair into ringlets using the figure-eight method, you need a hair length of at least 20 cm. The hair is thoroughly combed until the teeth of the comb begin to pass freely from the base to the ends of the strand. After this, it is necessary to determine the number of curls and their location on the strand.
A strand of hair is taken in the left hand. Tongs heated to the desired temperature are applied to the strands. The groove of the curling iron can be at the top or bottom, depending on which direction the curl is curled. If the curl is twisted in a “downward” manner, then the groove is located on top and the roller is located on the bottom.
Just as when curling hair using the “down” method, then grab the strand with the working part of the curling iron, turning it half-turn towards you. Immediately you need to make a full turn with the tongs, stopping them in such a position that the roller is turned towards the base of the strand. At this moment, you need to slightly pull the strand of hair with your left hand.
After this, the curl is processed in the same way as when curling using the “down” method.
When the curling iron begins to rotate in the right hand, with the left hand, bring the ends of the hair down on the other side of the strand, making a figure eight with it.
It turns out that if during the first turn of the curling iron the ends of the hair, wrapping around them, were on the left side of the strand, then during the second turn they will be on the right. With each new turn of the curling iron, the ends of the hair change their position, being either to the left or to the right relative to the strand being twisted.
With this method of curling, the ends of the hair are constantly located in the middle part of the working surfaces of the curling iron, which provides the most favorable conditions for curling. The ends of the curl are processed in the same way as they were done with other methods of curling curls.
The figure eight curling method can be done by holding the curling iron vertically and twisting the hair around it in a spiral.
Curls are shaped only after they have cooled completely. First, the curl is combed with a comb with rare teeth, and then with frequent ones.
3. STYLING WITH CURLERS
Women's hairstyles can be done using curlers, clips, brushes and a hairdryer. With this type of hair styling, the main attention should be paid to curling the hair with different types of curlers, since the quality of the resulting hairstyle depends precisely on the performance of this operation.
When curling with any type of curler, it is necessary to take into account that the width of the hair strand should not exceed the length of the curler. Failure to comply with this condition will violate a very important curling rule, which is that the hair must be perpendicular to the axis of rotation of the tool. The thickness of the hair strand being wound (at the base) should correspond to the diameter of the curler. This is important for fulfilling the next curling rule, which is that the strand of hair must be pulled perpendicular to the area of the scalp being treated.
Before curling your hair, you must wash it, apply a special styling compound and comb it thoroughly. From the entire mass of combed hair, you need to separate a small strand, the thickness of which should not exceed the diameter of the curler, and the width should not exceed the length of the curler. To perform this operation, it is convenient to use a comb with a tail. The hair of the treated area of the head is combed in the direction in which it will lie in the hairstyle. The comb is turned with the middle finger of the right hand with the tail facing the hair. When separating a strand of hair, hold the comb in the same way as a pencil or pen. The tip of the comb is inserted into the hair and the desired strand is parted so that it lies on the surface of the ponytail. After this, use the index finger and thumb of your left hand to remove the separated strand of hair from the surface of the ponytail.
If you don’t have a comb with a ponytail on hand, you can use an ordinary comb with rare and frequent teeth to separate strands of hair. As when using a comb with a ponytail, with your right hand and an ordinary comb, comb the section of hair intended for curling in the direction that it will be in the hairstyle. Then this area is separated from other hair by parting, and it is desirable that its width corresponds to the length of the curler. This will allow you to separate the strands for winding only by thickness, which will make further operations easier.
After parting the area intended for curling, take the hair with the palm of your left hand and, slightly pulling it away from the scalp, hold it in this position. Then a strand of the required thickness is separated from the hair held in the hand with a comb. To do this, the teeth of the comb are inserted into the hair. In this case, the comb should move to the left parallel to the upper parting, limiting the area of hair being processed. Moreover, the distance between the existing parting and the newly formed one when moving the comb to the left should correspond to the thickness of the strand required for winding on curlers. Thus, when you move the comb to the left to the vertical parting that limits the area of hair being processed on the left side, there will be a strand at the end of the comb intended for twisting.
After this, use the index finger and thumb of your left hand to remove a separate strand from the head of the comb and at the same time release the rest of the hair. Then comb a strand of hair and begin to wind it with curlers.
This described method of separating strands for curling is used on the temporal and occipital areas of the hair. But when treating the frontal or parietal areas of the scalp, a different technique is used. The strands are separated so that they do not fall on the edge of the comb, but in its working part, i.e. between the teeth. Then the strand is combed and transferred to the left hand. After separating, the strand of hair should be held directly at its ends in a slightly taut position between the index and middle or index and thumb of the left hand.
The comb must also be placed in the left hand between the thumb and the base of the index finger.
This position of the hair strand and comb is considered the starting position for any type of horizontal curling.
Curling hair on curlers with a pressure bar is carried out as follows. The curlers are taken with the index finger and thumb of the left hand on the side where the elastic band is located. This way the curler will be turned with the desired end towards the strand of hair. Next, lightly holding the body of the curler with the palm of the right hand, open the clamping bar slightly and hold it in this position with the index and thumb of the right hand.
A strand of hair is inserted between the body of the curler and the pressure bar by moving the right hand with the curler to the left.
When the strand is between the clamping bar and the body of the curler, the thumbs of both hands press the hair with the bar to the body of the curler. In this case, the index fingers of both hands support the curlers from below. Then the curlers are pulled back so that the ends of the hair move under the pressure bar and are clamped by it. If this condition is met, then the ends of the hair will not break. After this, the fingers of the left and right hands make the first turn of the curler.
Usually the strand is wound until the curler touches the surface of the head. Do not pull the hair strand too tightly in the final stage of curling, otherwise this can lead to damage to the hair follicle and even hair loss.
The strand already wound on the curlers is secured with an elastic band with the fingers of the left or right hand. It is more convenient to perform this operation with the index and middle fingers of the right hand, holding the curlers in the left hand, and with the finger of the right hand, stretching the elastic band and hooking it onto a special protrusion on the left side of the curlers, try not to twist the hair when securing it with an elastic band.
If you have curlers without a pressure bar, then from the starting position a strand of hair is placed on the body of the curler. The role of the pressure bar is performed by the index finger of the left hand. The curlers should be pulled out as usual. When the ends of the hair are pinched with the index finger of your left hand, you can begin twisting.
As you curl, the middle and ring fingers of the left hand follow the index, which presses the ends of the hair against the body of the curler. As soon as an almost complete revolution of the curlers is completed, i.e., the ends of the strips approach the place where they are captured by the strand, the index, middle and ring fingers of the left hand begin to slide through the hair towards their ends. At the same time, the fingers of the right hand twist the curlers so that the ends of the hair are sandwiched under the strand.
The sliding movement of the fingers of the left hand towards the ends of the hair strand must be carried out simultaneously with the twisting movement of the fingers of the right hand. By performing this operation in this way, you will be able to avoid creasing the ends of your hair.
When one turn of the curler has already been made, the curling is continued with the fingers of both hands, slightly pulling the strand. If there is no elastic band, the curlers are secured in the wound position with a special pin or clamp (Fig. 3).

If you have curlers with spikes on the working surface, then winding is done as follows. From the starting position, a strand of hair is placed on the body of the curler. With this design of the curler, it is impossible to completely clamp the ends of the curled strand of hair with the index finger of the left hand. Therefore, uniform distribution of stripes on the working surface of the curlers is achieved by simply pulling the curlers from the middle of the hair strand to its ends.
The spikes on the body of the curler additionally comb the hair, straighten its ends and give the hair a perpendicular position relative to the axis of rotation of the curler. Further winding is carried out in the same order.
Vertical hair curling with curlers is performed slightly differently than horizontal curling. A strand of hair with a base in the shape of a square rather than a rectangle is separated from the main mass. Moreover, it is desirable that the sides of this square are no larger than the diameter of the curlers and, in extreme cases, only slightly exceed it. When using curlers of this design, you must ensure that the end part with the teeth is always on the left. Only in this position can you fix them, since the configuration of the teeth allows you to hook the elastic in one direction - the opposite to the winding.
As you approach the base of the strands, gradually turning the curlers, they are transferred to a vertical position. At the very base of the strand, before making the last turn of the curler all the way, you need to lightly hold the hair with the index finger of your left hand so that it does not jump off the curler, and at this time put it in a vertical position. After this, use the index finger and thumb of your right hand to “tighten” the curlers to the end, then lightly press them to the scalp and then make a slight movement in the direction of unwinding. In this case, the teeth on the curlers will enter the hair at the base of the strand and thus the curlers will be fixed in the curled position.
Currently, flexible curlers are very widespread. With their help you can achieve almost any effect. You need to start stitching by dividing the hair on your face into three parts.

After this, wind the curlers in the backward direction (Fig. 4 a). When you finish curling the strands near your face, divide the next section of hair and curl the curlers in this row, but in the opposite direction (Fig. 4 b). In this order, continue to separate the hair and wind the rows of curlers, alternating the direction of curling (Fig. 4 c).
4. HAIR STYLING WITH A HAIRDRYER
If you need to make some areas of a woman's hairstyle more voluminous on short hair, the hair in these places needs to be raised. It is impossible to curl such short hair with curlers. In this case, only a hair dryer will help you give your hair the desired shape.
When styling your hair with a hairdryer, use a comb or brush. Using a brush is preferable, as you can comb your hair more thoroughly than with a comb, and the hairstyle will be durable and beautiful.
Laying stripes as a background makes it possible to obtain hairstyles of various shapes and patterns. The most difficult operation when working with a hair dryer is styling your hair in waves. When doing your hair in waves, you can use both a brush and a comb. But if you want to make the wave lines sharp, then it is more advisable to use a comb.
First of all, you need to rinse your hair thoroughly, as even a small amount of oil on it will make styling difficult. After drying and combing your hair, moisten it with a decoction of flaxseed or other styling composition. Having combed the hair again, it is given the direction required for the hairstyle.
When starting to make waves, you need to take the comb in your left hand, and the hair dryer in your right. Styling waves is usually done by moving the comb and hair dryer away from you.
Now insert the teeth of the comb into the hair, moving 3-4 cm from its base. Holding the comb so that its teeth are directed perpendicular to the strand, move it to the right by 1-1.5 cm. This movement will give the hair a direction to the right, as a result which is why the first wave line (crown) is formed.
After this, the comb is turned with its teeth towards itself so that the wave line is on the teeth of the comb. Simultaneously with turning the comb, move it towards you by 0.5-1 cm,
After this, direct the hot air stream to the left to dry the resulting wave line. To make it look more natural, repeat grabbing the hair with a comb and drying it several times. Now step back from the first line of the wave by 3-4 cm, make a second line. Its implementation differs from the first crown only by changing the direction of movement of the comb and hair dryer. So the second line of the wave is formed by moving the comb to the left and turning it not towards you, but away from you. Direct the stream of hot air to the right. These movements of the hair dryer and comb must be repeated constantly.
Treatment of hair with a hairdryer and brush should begin from the parietal area. Moreover, if the hairstyle is parted, then styling begins from the parting, and for a hairstyle without a parting - from the hairline on the forehead.
Let's say you need to do your hair with a parting on the left side. To do this, take a brush in your left hand and a hair dryer in your right hand (Fig. 5).

Holding the brush with the bristles down, it is inserted into the hair from the parting on the left side.
As soon as all the bristles have entered the hair, the brush must be lifted along with the hair. At this moment, you need to slightly turn the brush so that the right edge of the bristles comes out of the hair, and the left remains in it. After this, you should slightly move the brush towards the parting and at the same time along it to the left or right. This way you can lift the front edge of the hair away from the parting. A wave line is formed in its upper part.
A stream of hot air from a hairdryer should be directed from the parting under the brush, but do it in such a way as not to burn the scalp. To dry your hair more evenly, you need to move the hair dryer along the parting in the opposite direction from the direction of the hair that was given to it by the brush to form the wave line. After moving the hair dryer along the entire brush, it is removed from the hair.
This drying process must be repeated several times until the desired shape of the hairstyle is obtained at the parting, after which you can begin processing the frontal part.
Grabbing the hair with a brush and drying it in each area must be repeated several times. With such coordinated movements of the brush and hair dryer, all hair is processed, and you can comb it in any direction.
After blow-drying all your hair, comb it with a fine-toothed comb and secure it with hairspray.
Short hair will benefit from some volume. Apply a small amount of mousse evenly to damp hair. Holding your hair firmly and lifting it with your hand, dry it with a hairdryer using a slotted nozzle with a hole. Continue until your hair is completely dry and you'll have a stunning full-volume hairstyle.
4.1 Blow-drying hair for small volume hairstyles
Hair styling with a hairdryer when performing small volume hairstyles is performed as follows. Comb your hair and outline the direction of the main lines of your future hairstyle. Hair styling with a hairdryer should begin from the lower occipital area of the head. Holding the brush with the teeth down, insert it into the hair strand from the inside. The width of the strand should correspond to the dimensions of the working surface of the brush. Grab a strand and lift it up slightly. In this case, the hair tension should be on the first row of brush teeth on the inside of the strand. A stream of air must be directed onto the strand and fix the resulting hair crease. Allow this section of strand to cool on the brush until completely dry. Pull the end of the strand with a brush and dry it with a hairdryer in the direction of the lines of the intended hairstyle. After this, remove the brush from the dried hair strand. Continue styling in the same way on the remaining parts of the head, gradually moving from the occipital to the frontal zone (Fig. 6 a).
A  b
b
4.2 Blow-drying hair when doing hairstyles with the effect of sticking hair
Hair styling with a hairdryer when doing hairstyles with the effect of sticking hair (Fig. 6 b). Comb your hair and outline the direction of the main lines of your future hairstyle. When styling your hair with a hairdryer, you should start from the crown of the head, from the hairline above the forehead. Holding the brush with its teeth down, insert it into a strand of hair (the width of the strand corresponds to the working surface of the brush). Grab the strand with your teeth and lift it perpendicular to the surface of your head. Dry the root part of the strand by directing a hot stream of air at it from the inside or outside. Holding the strand in a vertical position, dry the ends of the hair. After the strands are completely dry, remove the air stream and allow the hair to cool in a vertical position in the brush. Remove the brush from the cooled strand of hair. In this way, style the hair on the area of the head where you want to create the effect of sticking hair.
4.3 Blow-drying hair when performing hairstyles with increased volume
Comb your hair and outline the direction of the main lines of your future hairstyle (Fig. 7).

When styling your hair with a hairdryer, you should start from the parietal area of the head from the hairline above the forehead. Holding the brush with its teeth down, insert it into a strand of hair from the inside (the width of the strand corresponds to the size of the working surface). Pull the strand captured by the brush in the direction opposite to the comb of the hair of the future hairstyle. Direct a stream of hot air to the root part of the strand and dry it. Move the brush along the strand away from you, and then rotate it towards yourself with the teeth up so that the ends of the strand are on the teeth of the brush. Smoothly bend the end of the strand in the direction of the hair comb and dry it, changing the direction of the air stream. After drying the strands, remove the air stream and allow the hair to cool on the brush. Pull the brush out of the cooled strand of hair. In this way, style hair in areas of the head where the hairstyle should have increased volume.
The romantic style in women's hairstyles is reflected in models with waves. The technology for making waves can be different. Waves are performed using electric curling irons, a hair dryer, using specially designed electric curling irons - “new wave” or the traditionally known cold method.
Hair of any structure lends itself to cold styling. To create a beautiful wave on coarse and straight hair, it is suggested to perform a light perm or use a hair styling product. To create a wave, comb your hair away from the face in the direction of the lines of the intended model. Insert the comb into the strand and move it away from the hairline with combing movements. Leave the comb in the strands in a position perpendicular to the surface of the head. At a distance of 2-3 cm from the hairline on the forehead, press the strand with the middle finger of your left hand to your head. Move the strand of hair by moving the comb from left to right along the comb blade. Hold the strand of hair forming the crown between the middle and index fingers of your left hand. Comb the hair below the index finger with several movements. Secure the wave line with a flat clamp. Now we perform the second wave line. Step back 2-3 cm from the first wave line and press the hair to the head with your middle finger. Insert the comb into the hair and move with combing movements to a distance of 2-4 cm. Leaving the comb in the strand in the 1st position, move it from right to left along the working surface of the comb to obtain the second crown. Using your index finger, press the strand forming the crown onto your middle finger. Use a flat clamp to secure the concave part of the wave between the crowns. If necessary, continue making waves to the end of the strand.
Use a diffuser to dry long hair.
What is a diffuser?
The bowl-shaped hair dryer attachment is indispensable for drying curls without additional curling. It is gentler on your hair than a straight-through hair dryer. Some hair dryers are sold complete with such diffusers. If you buy them separately, make sure they are compatible with your hair dryer.
4.4 Blow-dry your curls
1. Choose your styling mousse carefully: strong hold mousse is ideal for fine and normal hair, normal hold mousse for thick or permed hair.
2. Rub half of the mousse into the hair roots, distribute the remaining amount with your fingers along the entire length.
3. Throw your hair forward and dry it so that the air stream is directed from bottom to top.
4. When drying, lift the hair strands. And on the top of the head, hold the hair dryer a couple of centimeters above the hair. Continue until you achieve the desired effect - lots of soft curls (Fig. 8).

5. This operation is good not only for creating waves, but also for styling natural curls and chemicals.
CONCLUSION
Each person has their own hair type: some have long, some have short, some have thin, some have thick, and the list goes on and on.
All people want to be beautiful, to have their own “zest”. And to become beautiful, you must first of all put your hair in order: get a fashionable haircut, perm or style it. You can do all this yourself, but at home without the necessary and special tools it is almost impossible. That's why people go to hairdressers.
Hairdressers can be compared to wizards, because they create beauty, they make the impossible possible. To do this, they need to know all the intricacies and features of hairdressing.
In order to do hair styling, the master must know all its features. They should know:
That styling can be done cold;
That you can style your hair using curling irons;
That you can style your hair using curlers;
You can style your hair using a hair dryer.
LITERATURE
1. Gutyrya L.G. “Hairdressing Art”, M., 2000.
2. Olin P.T. “Hairstyles and hair care”, K., 1995
3. Konstantinov V. P. “Hairdressing”, K., 1987
4. Album “Zachiski for girls”, K., 1997.
5. Dobina N.S. “Home hairdressing salon.”, M., 1996
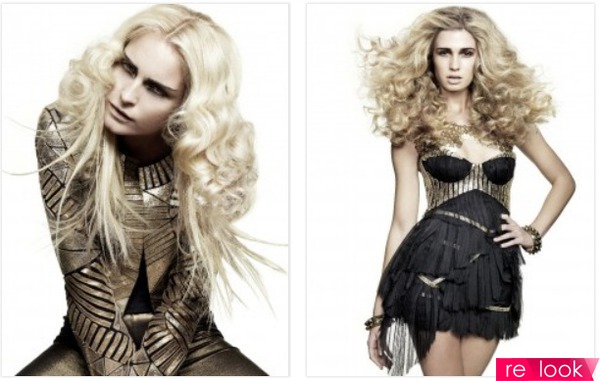
Tongs have long replaced curlers. With this tool you can add volume to your hair and make large or small curls. Styling with hot curling irons is one of the easiest and quickest ways to create a casual or festive hairstyle. The main thing is to be able to use an electrical appliance correctly.

Preparing curls
Before styling medium hair with curling irons, let’s familiarize ourselves with the rules for preparing hair for the process.
- To prevent the oily film on the curls from spoiling the effectiveness, styling is done on clean hair.
- The appliance should only be used on dry hair.
- All hair is combed well to avoid tangles. If necessary, you can use a special product to facilitate styling.
What products will you need for styling with curling irons:
- When using an electrical appliance regularly, be sure to use thermal protection. It does not replace styling products, but protects strands from exposure to high temperatures. Apply along the entire length of the curls.
- To make styling with curling irons on medium hair look voluminous, apply a special powder to the root zone.
- The finished hairstyle is strengthened with gel or varnish for fixation.
How to style medium length hair with a curling iron?
In order to make small curls, you need to divide your hair into strands up to two centimeters wide, for large curls - up to six centimeters.

Laying with tongs and corrugation
Let's reveal some secrets on how to use an electrical corrugation device to create volume in the root zone or create an exquisite styling. Correct temperature:
- 210 degrees for tight or wavy curls;
- 180 degrees for dry and weakened strands.
For volume, the hair is treated with fine wave curling irons only at the root zone. You will need a large corrugation if you want to create voluminous waves.
Styling medium hair with curling irons (crimp) - step-by-step instructions:

Figure eight laying
- Comb your hair well.
- Separate a small strand and hold it in your left hand, the electrical device in your right.
- Open the tongs and pinch the strand with them.
- The device is turned towards itself half a turn.
- Make a 360-degree turn so that the groove is directed toward you and the roller toward the ends of the hair. During this process, the strand must be taut.
- Hold in this position for up to ten seconds.
- Pull the electrical device away from the gripping area and perform another 360 degree rotation.
- The right hand is used to rotate the device, and the left hand directs the ends of the hair down (on the other side of the strand), as if forming a figure eight.
- Use these movements to style your entire hair.
How to do vertical styling?
The strands are curled in a spiral, while the device is held in a vertical position. The hairstyle is styled only after the curls have completely cooled.

Step-by-step instructions for vertical styling with a curling iron on medium hair (photo attached).
- Comb the entire hair thoroughly.
- Open the device, fix the separated strand at the root zone and lower the tongs to the ends of the hair.
- Make a curl, turn the electrical device vertically and slowly wrap the curl, moving towards the root zone.
- Wait ten seconds, turn the tongs in the opposite direction. They open and take them out.
- This procedure is done over the entire head.
Horizontal installation method
To make the curls springy, the electrical appliance should be held from the inside.
Down styling is used to create a variety of hairstyles.
- A small curl is separated and pulled evenly.
- In the root zone, clamp the strand and run the electrical device down to the very ends.
- Without letting go of the ends, they begin to curl the hair using the device to the very roots.
- Hold for ten seconds.
- Open the tongs and pull them out.
- The curl is fixed with a clamp until it cools completely.

Light curls
This curling style for medium hair will not take much time, but will look impressive. Let's look at the classic way to create light curls.
- Apply thermal protection to slightly damp hair.
- Use a hairdryer to dry the strands completely, using a cool air setting.
- They make a parting, it can be anything, it all depends on the desired hairstyle.
- Separate the curl, pin the loose hair with a clip so that it does not interfere.
- Apply mousse for fixation and wind the lock onto an electrical device.
- This procedure is done on all hair.
Spiral curls
Such curls are directed towards the face on one or both sides.

Accessories
The right accessories will help complete your look. The same hairstyle can look different if you add a headband, ribbon, scarf or tiara to your hairstyle.
Combs or headbands with stones, and wreaths with flowers will go well with holiday hairstyles.
Hairpins, fabric headbands, and satin ribbons are suitable for everyday styling.
- Regular use of heating styling tools dries out your hair, so when washing your hair, use not only shampoo, but also hair conditioner.
- To restore your locks, select a mask according to your hair type and use it twice a week.
- Before going to bed, comb your hair with a massage brush; this simple procedure has a beneficial effect on the scalp.
If you know how to use curling irons correctly, you can create not just styling, but real masterpieces.